Category: In Depth

This is the section for our longform, long reads & detailed articles. Usually (but not strictly) on a single subject, and longer than 400 words.

  • Recovery From Water Damaged Fishing Boat – Plotter GPS Olex Chart Computer

    Hard Drive from water damaged Olex fishing PC
    One of the worst hard drives we’ve ever seen for data recovery

    We recently heard from a local fisherman that had been unfortunate to have his boat take on water whilst moored during a storm. Due to a series of unfortunate events, the only record of his fishing pots out at sea were stored on the ship computers. These computers were not only submerged in seawater, but also diesel from the engines.

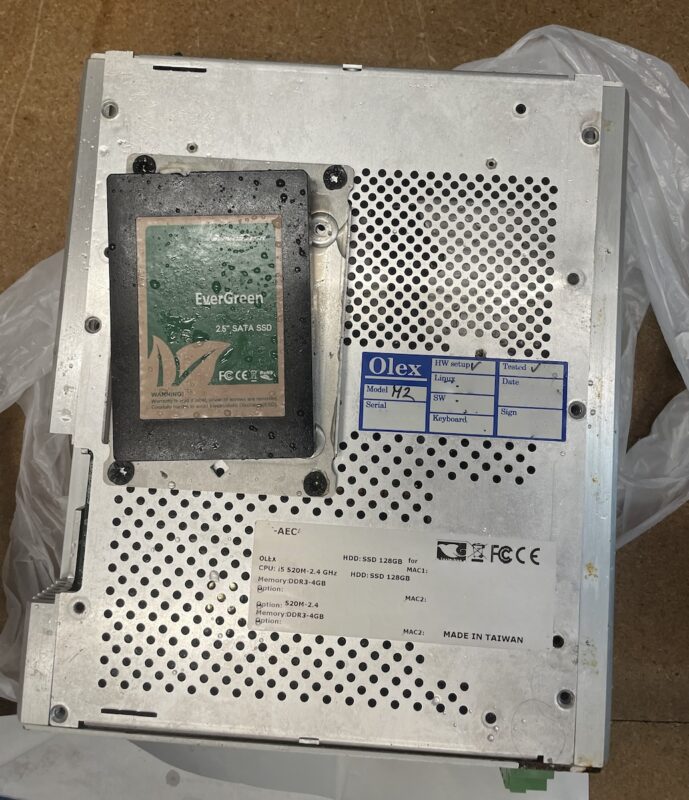
    Our first step was to carefully extract the storage drives from the computers. One contained a 128GB InnoDisk EverGreen SSD, and the other a Toshiba Hard Drive.

    We decontaminated the surfaces of the drives, to make them easier to deal with. We don’t often have diesel soaked disks in our workshop.

    A Warning ⚠️

    It is important with any liquid damage to make sure there is nothing still wet before you apply power.

    The SSD

    We removed the SSD circuit board from its shell, and found that water and diesel were present inside. Using a combination of chemical cleaners and delicate pads and brushes, we cleaned the board, and then let it dry thoroughly.
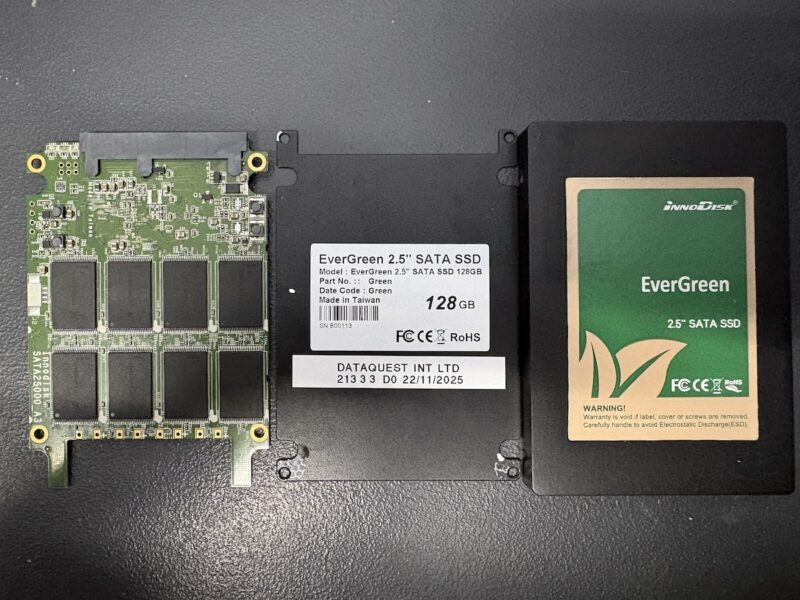
    InnoDisk EverGreen SSD from Sunken fishing boat
    Water and diesel damaged InnoDisk EverGreen SSD

    Once dry, we checked for short circuits, and found that the device wasn’t shorted. We applied power, but the SSD failed to reach a ready state. Although the main power rail wasn’t shorted, there must have been a problem further downstream. We found an area of the board that was getting no power, and found a damaged SMD resistor nearby. Replacing that got the drive correctly identified, and we were able to make a full clone copy of the disk.

    Once the clone was complete, we were able to recover the files containing the fishing data, and send to the customer to have reloaded onto a replacement unit.

    So far, so good.

    The HDD

    Some of the screws on the circuit board were a bit corroded, but the board itself looked in a reasonable state. Most boards can be adapted using the ROM chip, so rather than attempt to repair the board, we saved the ROM chip contents, and wrote it to a matched board.

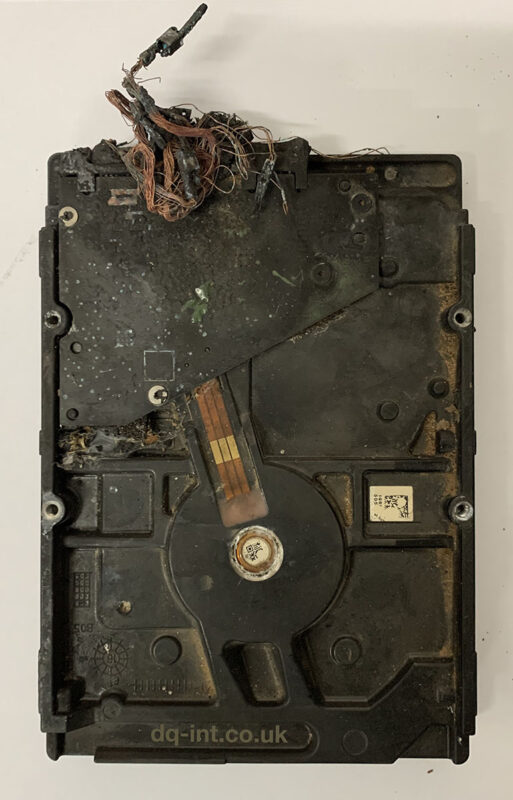
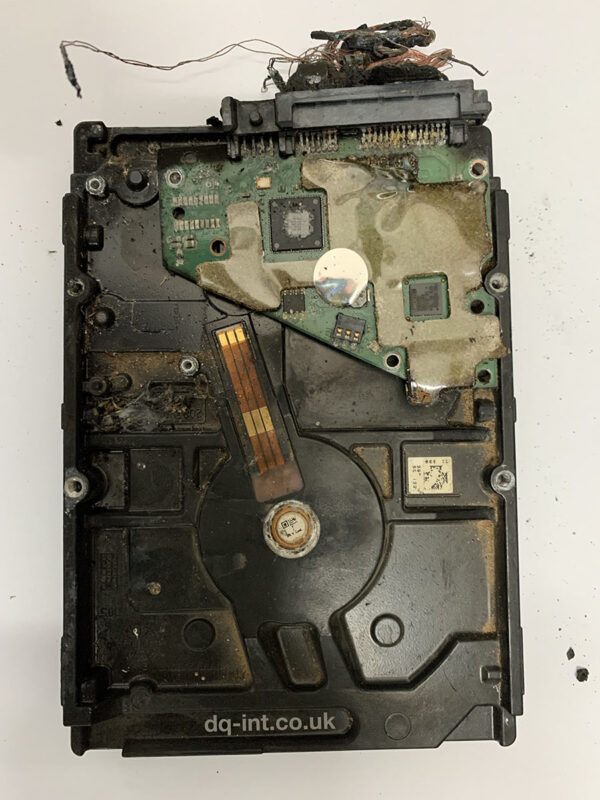
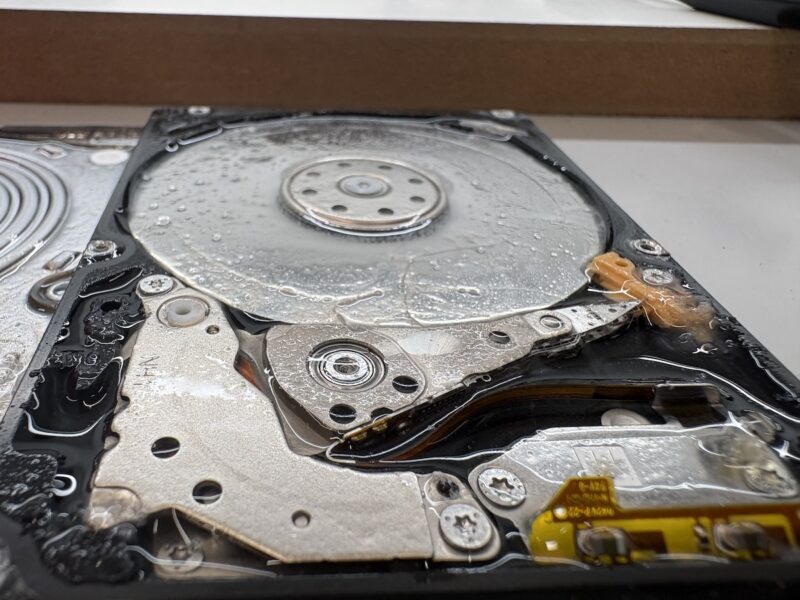
    As with the SSD, it was important to make sure no water had got into the delicate parts of the drive. People assume that hard drives are sealed, but almost1 all disks have a small breather hole, to allow for the pressure inside to equalise during normal use. We’ve seen many water damaged disks where no water managed to get through the hole, but this was not one of them. Inside this drive was full of thick, almost jelly like liquid.

    Water Damaged Toshiba Hard Drive from sunken fishing boat
    Water and diesel damaged Toshiba hard drive

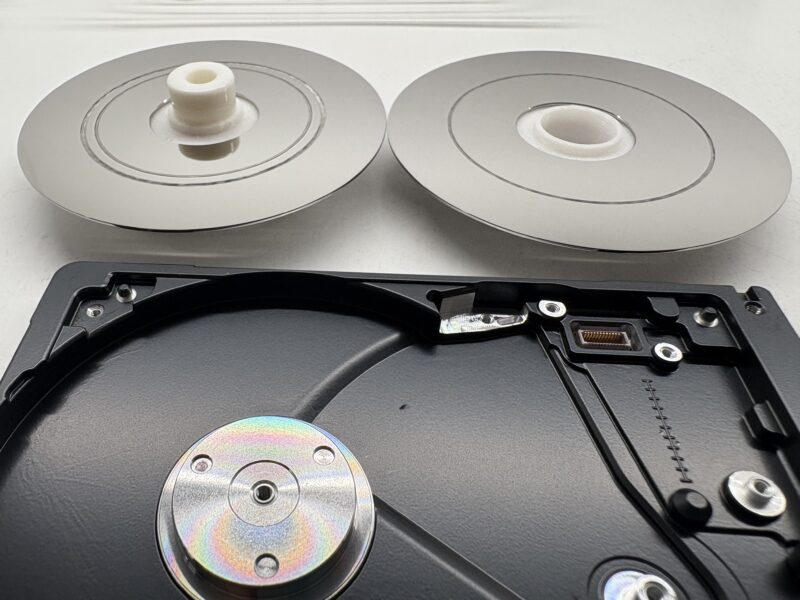
    We didn’t hold out much hope, especially as there seemed to be concentric rings on the disk surface, which usually indicate scratches from the heads. Fortunately after a thorough clean, we noticed that the rings were caused by the shape of the top cover. Not damage, just rings of sediment / dirt.

    We removed and cleaned the disc, and then placed it into a donor casting. The only original part of the hard drive was the single glass disk, and the ROM contents.

    With a bit of manipulation on the data recovery kit, the drive showed up and allowed us to load the filesystem to see the files and folders. When working in this way, all sectors we read are simultaneously saved to another disk. This allows us to build up a copy of the disk over multiple passes, without having to read the same parts over and over again (the next time we request the same sector, it comes from our copy instead of the failing disk). It’s how we always work, but really makes sense with disks like this in such terrible condition.

    After four sets of new heads, we finally had the fishing data recovered from the disk. Looking back at the photos, it’s hard to believe that any recovery was possible in this case.

    Luckily, the data required from this sort of thing is usually small lists of numbers, coordinates etc, so can be possible to read even if the drive is in a bad state.

    Footnotes

    1. Helium filled disks do not have a breather hole. ↩︎
  • You Can’t Win Them All

    We often get called Saviours or Magicians. But sometimes the magic wand just doesn’t work. This unfortunate drive had serious media damage on both discs and both surfaces. You can see the scratches are so deep they’re down to inner glass layer.

    The drive in question is Seagate Ultra Slim Portable. The damage maybe not be as bad as some we have seen in the past, but it’s still bad enough to prevent recovery.

    Click here to see more about Media Damage and other types of Failures.

  • Helium Hard Drives – Data Recovery Challenges

    A Bit of Background

    A helium hard drive is a mechanical hard disk drive with an internal enclosure filled with helium gas instead of oxygen. The enclosure is then hermetically sealed to slow the escape of gas. Helium creates a unique low density environment where the internal hardware can operate more efficiently resulting in less turbulence compared to air. With less rigidity in platter thickness required, this allows manufacturers to increase hard drive capacity by adding more slimmer platters into the same amount of space.

    The Data Recovery Challenges

    Less turbulence means less resistance so ideally opening a helium hard drive would be carried out in a helium filled environment. We have been successful in carrying out internal rework to allow access and attempt data recovery from helium hard drives in our clean room environment by using a strict and controlled process.

    Cutting Open a Helium Hard Drive

    Helium hard drives have a sealed aluminium top cover that is welded to its outer casting, so needs to be forcibly removed using a sharp implement. Some videos online show people using CNC mills, or saws to open the case, however we found1 that these allow small particles of metal to find their way inside the enclosure. This top cover keeps the helium gas trapped inside the hard drive. Once the external aluminium cover is removed the hard drive can then be taken into our clean room for decontamination. The internal cover can then be removed to carry out any internal rework required and then replaced once complete. The process of accessing the helium hard drive for data recovery uses the same hardware and technology as with standard hard drives. ie. Mapping used sectors, cloning to a working disk, and then extracting the files.

    Parts

    Helium filled disks are some of the largest on the market, so donor parts can work out expensive. In some cases the parts can cost as much as the recovery itself, especially when we need to match a certain revision or date of manufacture.

    The Outcome

    Recovering data from a helium disk is often a challenge, but something we’re happy to take on. Now if only all hard disks had a welded top cover, we’d never have to worry about people opening disks outside of the cleanroom any more!

    Contact Us Now…

    For a fast reply from a real person.

    Footnotes

    1. In testing, not with customer disks! ↩︎
  • Yamaha AW2816 Audio Workstation Data Recovery

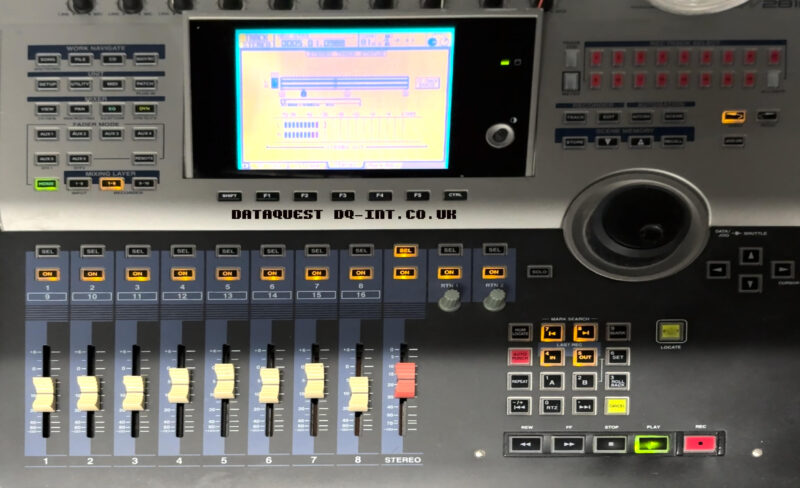
    Yamaha AW2816 Audio Workstation for Data Recovery

    We recently had an interesting case to recover. Although the disk was just a normal 20GB IBM Travelstar1 from circa 2001, the contents were not so common.

    This disk was from a Yamaha Audio Workstation; A combination of a multi track recorder and mixer etc. It’s a lovely big lump of kit, with motorised faders and a graphical display.

    Sounds Like Trouble

    Problems started when the user was in the middle of an operation saving something, and the device stalled. After a hard-reboot, the disk was reportedly unreadable. Nightmare. There is no capability on-board to self repair a damaged disk, so that’s where we came in. We’ve recovered the data from similar machines, but never this exact one.

    The Recovery

    First things first, we connected the disk to our diagnostic kit. After a bit of complaining, the disk reached a ready state and allowed us to start reading sectors. We were a long way from success, but this was a good start. After a bit of back and forth, we eventually had a full copy of the whole disk. We transferred this copy to a suitable old 2.5″ disk, and installed it into the machine. The AW fired into life, and then reached a screen that reported “Loading Song Info…” at a frustrating 96% it stopped and reported an error.

    Software

    This machine doesn’t use PC formatted disks, so there was no software available to scan and discover the songs. After finding a Facebook group for the larger AW4416 device, I was lead to an obscure software tool that could interpret the disk format and extract songs, tracks or whole device backups. I tested the free version first and was able to read the song list and extract sample audio. That was good enough for me. I bought a license for the full tool, and got all the songs exported to Yamaha CFS backup files.

    New Disk

    The original plan was to convert the machine to CompactFlash. I’ve done many similar conversions for everything from CNC milling machines to iPods, and yet no combination of card or adapter would work reliably. The only thing that did work reliably was an old 4GB SanDisk Extreme III card. but that was too small to take all the songs. The newer 32GB Transcend 133x cards are reported to work, but didn’t for me.

    Plan B

    Instead I went though our stock of 2.5″ laptop disks and found a nice clean 60GB HDD from a Mac PowerBook G4. I tested and wiped it, and then installed into the AW. On boot up it asked if I wanted to format the blank disk so I did. Then I removed the disk again and attached it to the PC to reload all the song backups. After reinstalling into the AW2816 I was pleased to see the songs all loaded and playing & scrubbing through tracks without issue.

    The workstation is now back with the user and being put through its paces. We’ve also advised on a backup regime to help avoid future disasters. It seems to be one of a minority with a functional CD burner, so the plan is: Regular song backups to CD, and periodic whole-disk backups to a computer.

    Original Disk:
    IBM Travelstar IC25N020ATDA04-0

    Replacement Disk:
    Fujitsu MHT2060AT

    Footnotes

    1. We’ve recovered 143 of these since we started tracking model numbers in 2003 ↩︎
  • LaCie External SSD Recovery

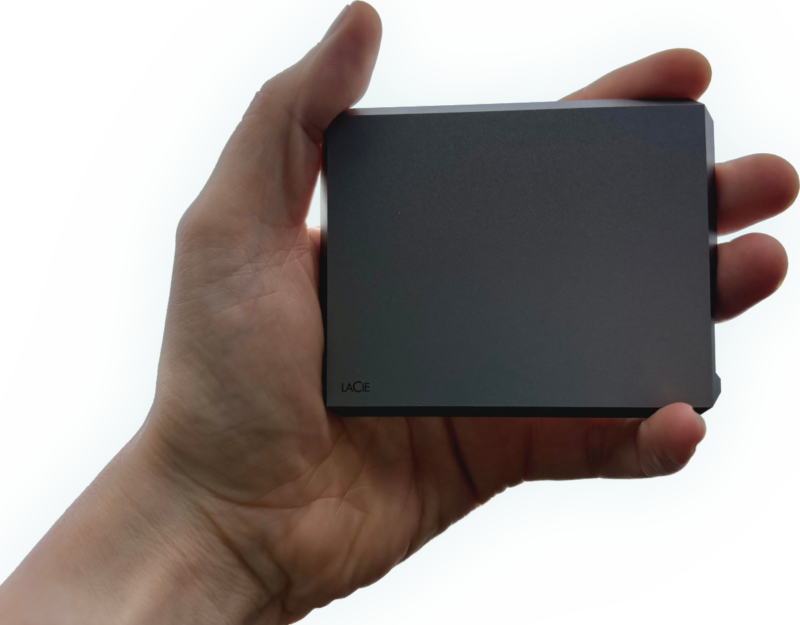
    A hand holding a LaCie External Mobile SSD for data recovery

    The first battle when attempting to recover one of these LaCie SSDs is getting into the thing! Fortunately LaCie have used this design before for external hard drives, so we’ve already figured it out. It’s not for the faint of heart though. You need to carefully, and delicately slip a strong bare Stanley blade into the seam on the back of the device. This is just thin enough to slide in without damaging the Aluminium, but strong enough to not snap. Warning, do not try this at home! There’s a knack to it, and you could easily slice off something fleshy by mistake.

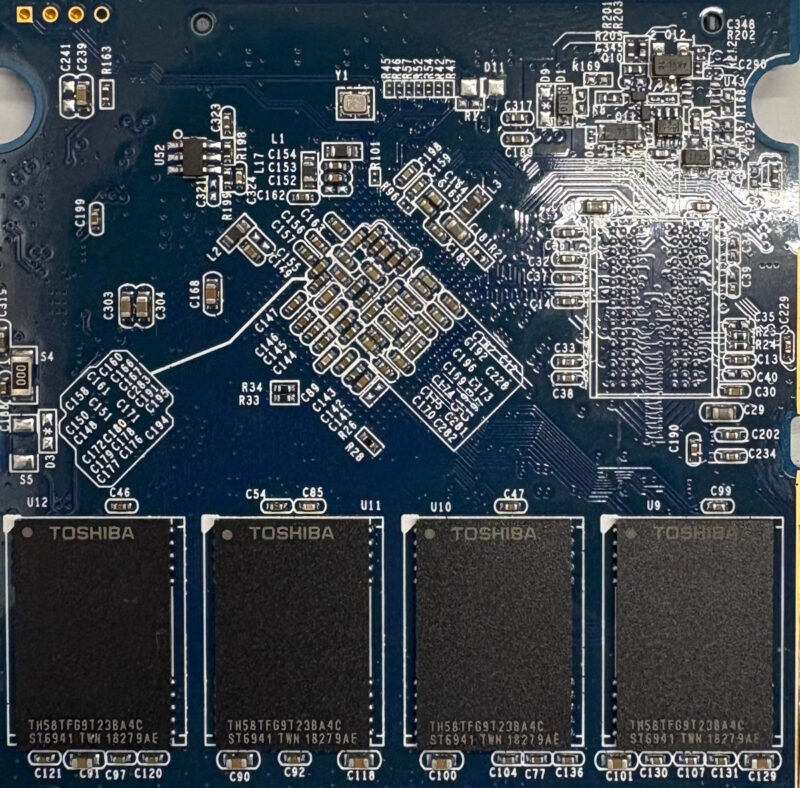
    The circuit board from a LaCie Mobile SSD, showing Toshiba NAND chips
    LaCie External Mobile SSD

    The next bonus is the controller chip A Seagate branded Phison chip, for which we have excellent support in our tools.

    The Diagnosis

    When connected via the USB-C port, the bridge interface is correctly identified, but it shows no attached media. (Like a CD drive with no disc inserted.) This usually indicates that the bridge device is working OK, but the SSD is not.

    When connected by SATA to our tools, we can see that the drive is stuck in Safe Mode, AKA Firmware Update Mode. The main clue is the capacity reported as just 2MB. This can happen when the drive firmware is unable to fully load, so instead reverts to safe mode.

    In this case we can upload temporary custom firmware to the SSD and then read from the original NAND chips to find the data. The rebuild went well, and we were able to access all the files. Some errors were reported during the file extraction, so we suspect that one of the NAND chips had started to fail.

    This was an excellent drive to work on, and the outcome was ideal. Fortunately nobody had messed with the drive before it got to us, so the NAND storage hadn’t fully degraded.

    If you have a failed LaCie Mobile SSD and would like help getting it recovered…

    Contact Us Now…

    For a fast reply from a real person.

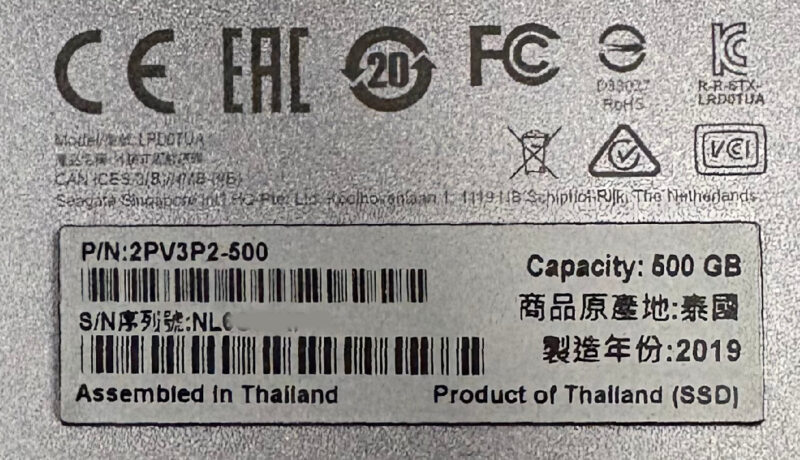
    LaCie Mobile SSD – LRD0TUA 2PV3P2-500 NB131WVE

  • The Death of Undelete

    Deleting files and formatting disks just got a whole lot more dangerous!

    Are you sure you want to permanently erase the items in the Bin?
You can't undo this action.

    Back in the good old days1, before fast SSDs, and multi Terabyte disks, if you accidentally deleted a file, you could be fairly confident that you could get it back. In classic Mac OS, it wasn’t uncommon to have Norton UnErase running every time your Mac shut down, to show a list of deleted files for you to optionally restore.

    Not to be overdramatic, but those days are pretty much gone.

    What changed?

    With modern disks you cannot run a quick undelete to recover files. In fact, even powering on a disk after you deleted some files could actually destroy those files permanently.

    For various technical reasons2, disks now need to keep track of which sectors are in use. This allows them to carry out background “housekeeping” tasks to keep the disks running smoothly. Modern operating systems issue a TRIM command when you empty the recycle bin, to let the disk know which sectors are no longer in-use. The disk will then erase those sectors and add them back to the pool of available sectors.

    An example of some disks that likely wipe out deleted / formatted data

    • Western Digital (WD) My Passport drives from 2TB+
    • Seagate external drives from 2TB+
    • SD / microSD / SDHC / SDXC cards
    • m.2 SATA SSDs
    • m.2 NVMe SSDs
    • SATA SSDS
    • iPhones / iPads / Android phones & Tablets
    • + Lots of other variations of the above!

    If you’re unsure, you should safely unplug the disk ASAP, and get in touch. We’ll hopefully be able to let you know the chances of recovery.

    Conclusion

    If you accidentally delete some files, or accidentally format a modern disk, your chances of recovering those files are greatly reduced. Act fast and turn off the disk ASAP. You may prevent the data being lost for good, but it will likely need to be recovered by a professional. If that happens, you must let them know the situation, so they can handle it properly.

    Good luck!

    Footnotes

    1. Before 2008 for MacBook Air users, with SSDs instead of HDDs ↩︎
    2. Cheap / dense storage chips, or SMR hard drives ↩︎
  • Warning For NVMe SSDs With Deleted Data

    Your quick response to an SSD with data loss could now make the difference between a successful or failed data recovery.

    The Short Version

    If you have an SSD with missing or deleted data, you must power off the device as fast (and safely) as possible to retain the data. You shouldn’t power the drive again after that. Even just powered up and idle, the SSD will run background processes to start cleaning out sectors marked as deleted. Like a snake eating its own tail, you’ll be destroying the data as you attempt to recover it. ♾️

    The Long Version

    Modern consumer SSDs use a combination of cheap multi1-layered flash storage chips, and smart software to spread out the written data over the whole device. Known as wear levelling, these algorithms are intended to prevent frequently used sectors from wearing out prematurely.

    For context, on a traditional2 hard disk, every time you request a sector, the same sector gets shown3. If a sector had old data inside, you could recover it until the data was replaced with something else. This is the basis of all traditional wisdom about deleted files not really being deleted. However, on a wear-levelled SSD you can never be so sure. The first time you save a file, it will get written to one sector from the pool. Once you delete the file stored there, if you request the same sector, the SSD will shuffle the pack and give you a fresh new sector from somewhere else. This drastically reduces the opportunity to recover deleted files.

    There is an additional problem when you add TRIM into the mix. When carrying out certain disk tasks like emptying the recycle bin or reformatting, the operating system also sends a TRIM command. This lets the SSD know which sectors are no longer in use. From this moment, you have a matter of seconds or minutes to power off the device before it starts erasing those blocks of data.

    A Solution

    If you power off your disk in time, we have tools that allow us to load custom firmware on many brands of SSD. This firmware runs temporarily on the SSD RAM before the normal SSD tasks can start. This blocks the SSD from making any further changes to the stored data. If caught early, this can be enough to allow us to extract the missing files.

    If not caught early, there is still more we can do. We can attempt to rebuild maps of sectors that were recently TRIMmed, and add these back to our clone drive. This is less than perfect, as usually some of that data has already gone. In many cases some data is better than nothing!

    For a long time, we had to treat SSDs much the same as hard drives. Now we have specific tools and procedures in place to make sure we can still extract the maximum possible data from them.

    If you’ve lost data from any device, get in touch as soon as possible. We never want to see people losing data, so we’ll always advise the best way forward.

    Contact Us Now…

    For a fast reply from a real person.

    Footnotes:

    1. TLC = Triple Layer, QLC = Quad Layer, V-NAND = 5 Layer etc ↩︎
    2. Until SMR drives at least 🤦‍♂️ ↩︎
    3. Sometimes bad sectors get replaced with spares, but you know what I mean. ↩︎
  • Data Recovery for Burnt CCTV System

    We recently completed an extremely difficult recovery from a fire damaged hard drive. The drive was stolen from an Annke CCTV system during a burglary and then set on fire.

    This is what we received:

    Photo of a burnt Seagate Hard Drive
    Photo of a burnt Seagate Hard Drive

    Despite looking like it had fallen from space, we could recognise that it was a Seagate drive. Most of the label was burnt off.

    Where to start with the recovery

    It’s easy to get overwhelmed by a case like this, but it’s important to break the problem down into manageable chunks. First we needed to extract the unique information from the circuit board (PCB). The board was black and charred from the outside, but the delicate underside was still green, and it looked like the main components survived. With a little bit of a clean-up we were able to read the required info and transfer it to a suitable (non-burned) donor board.

    Next, we needed to turn our attention to the inside of the drive. We gave the outside a thorough clean first, to avoid transferring contamination inside. Then we opened up the drive to assess the damage. The gasket between the top cover and main device had turned to a gluey mess, so we had to be careful separating the two.

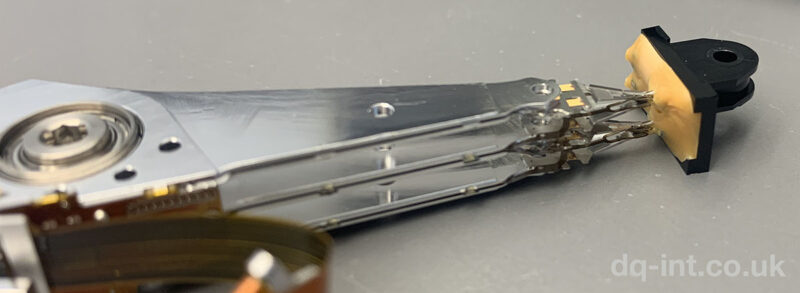
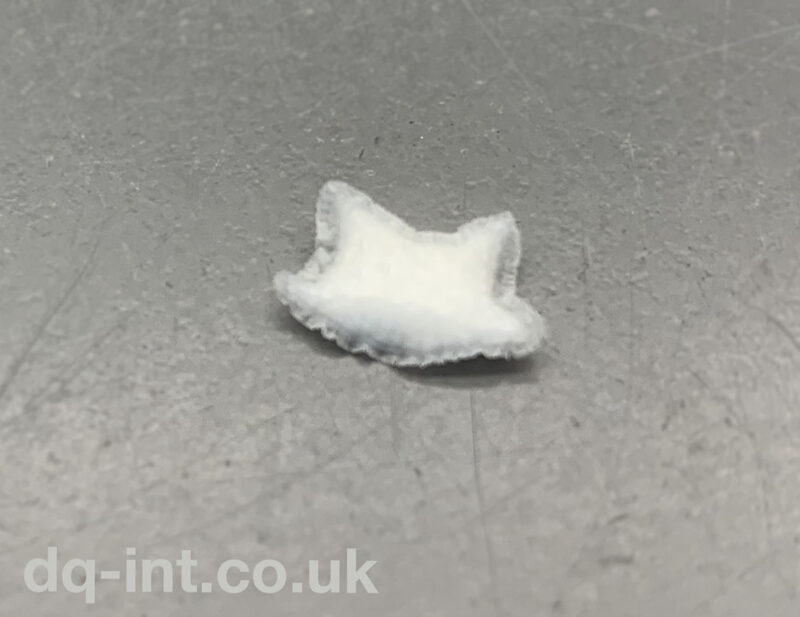
    It’s important to point out that we haven’t attempted to power up the drive so far. Spinning up a drive in this state will never end well, and it’s a good job we didn’t. The heads were melted into a plastic blob that was once a parking ramp, and the particle filter was transformed into a stiff little pillow. By some miracle, the discs (platters) themselves were in surprisingly good condition. The pack of discs was also turning freely, so the motor was not stuck.

    Photo of Seagate heads melted into their parking ramp
    Seagate heads melted into their parking ramp

    We replaced the filter with one from a similar drive, but the heads would be the real challenge. It wasn’t possible to read the exact label information (it was burnt off), so confirming a match for a suitable donor was a challenge. We could read some of this missing info from the circuit board that we’d backed up earlier. There was another worrying sign on what was left of the label. A warning that the Warranty was valid only in China, and Exclusive to China. We worried about trying to source such a drive if it was only intended for the Chinese market.

    Shrunken particle filter from a burnt Seagate hard drive
    Shrunken particle filter

    We did find a suitable donor, and installed the new heads and parking ramp into the drive. We also borrowed the new top-cover as it was clean, and still had a proper gasket.

    Moment of truth

    The drive came ready, and although it was reporting some problems, allowed basic access. We were able to carry out our usual Seagate process, and start cloning sectors to another drive. This process went extremely well, and only tripped up a handful of times. In the end after multiple passes, we had skipped just 100MB of the drive due to errors, and successfully extracted the 2-3TB of CCTV footage.

    In total, the whole process took just under three months, mostly due to delays finding a suitable matching donor, and then the careful imaging process.

    The best part of the story is that the burglar was clearly visible in the footage so will hopefully be brought to justice.

  • Fake HDD Data Recovery

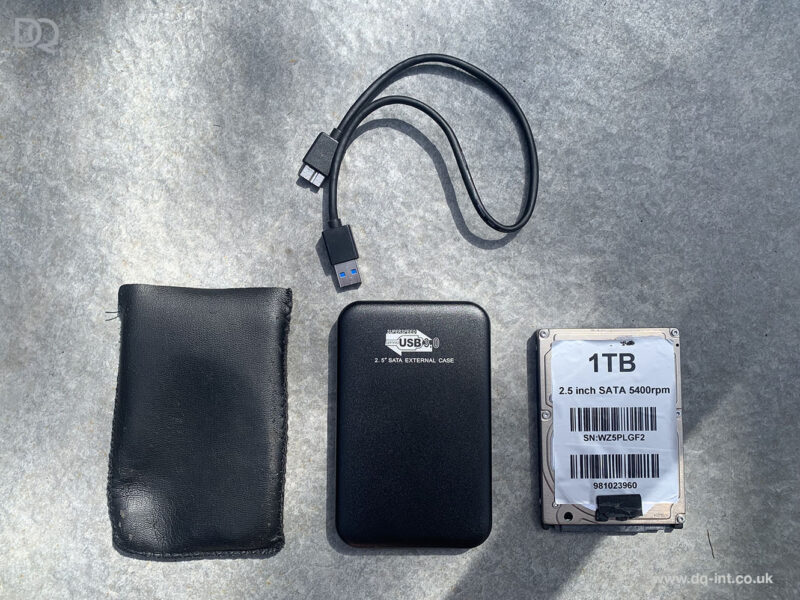
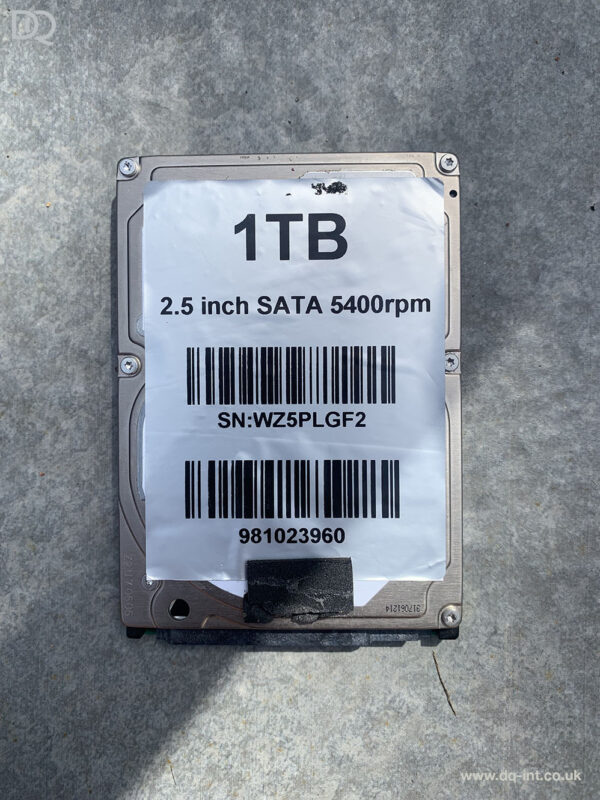
    The saga of fake eBay and Amazon products continues. This latest instalment was supposedly a 1TB USB External Hard drive that had failed. The client didn’t suspect anything unusual about the drive until it failed, so sent it to us for diagnosis. When we removed the drive from the generic external case, we found a drive with an extra plain label over the usual manufacturers label. This is not unheard of, but is unusual, and made us a bit suspicious. We peeled back the plain label, and underneath was a 120GB hard drive, that looks like it was pulled from an old HP laptop.

    Upon connecting the drive to our diagnostic kit, the drive had a problem in the firmware area and couldn’t reach a ready state. In other words, the data was not accessible. After a lot of head scratching and tweaking around with the firmware, we found the fault and got the drive into a ready state. That’s when we noticed the model number didn’t match the label. Also the hard drive was identifying itself as 1TB, even though we know it was only 120GB.

    RealFake
    ModelST9120822ASST1000LM024
    Capacity120GB1TB
    Real vs fake drive info

    There were a few bad sectors during the image process, but that’s not surprising when you consider it had possibly been in use since around 2007. All customer data was successfully recovered.

    As usual, our current advice when buying storage drives online these days is as follows: Go for brands you know. Check you’re not getting too-good of a deal. If possible, fully test the device using a manufacturer’s tools before you trust your data on it. Most manufacturers provide free tools to test their own drives.

  • Why It’s Impossible to Give a Meaningful Time Estimate When Cloning a Failed Disk

    Our data recovery process almost always begins with a copy process. Otherwise known as cloning or imaging, we attempt to copy every data block from the failed disk to another disk.

    With a normal disk, we can record how long it takes to copy a block, then multiply by the total number of blocks to calculate how long the process will take.

    Cloning a Disk
    Cloning a Normal Disk

    With a faulty disk, this is not possible. A faulty disk will often read different blocks at different speeds depending on how bad the problem is. Until we read the block, there’s no way to know how long it will take. This is illustrated in the animation below. (Sorry, the GIF below is quite large so may take a while to load.)

    Cloning a Failed Disk
    Cloning a Failed Disk

    With a faulty disk, we have to keep copying blocks until we get all the data. You can see from the animation above that it’s impossible to know how many slow blocks are coming up, versus good blocks.

    This is the third part of a mini-series about copying data.

    Read Part One here about copying small vs large files.

    Read Part Two here about why computers always guess the wrong copy time.