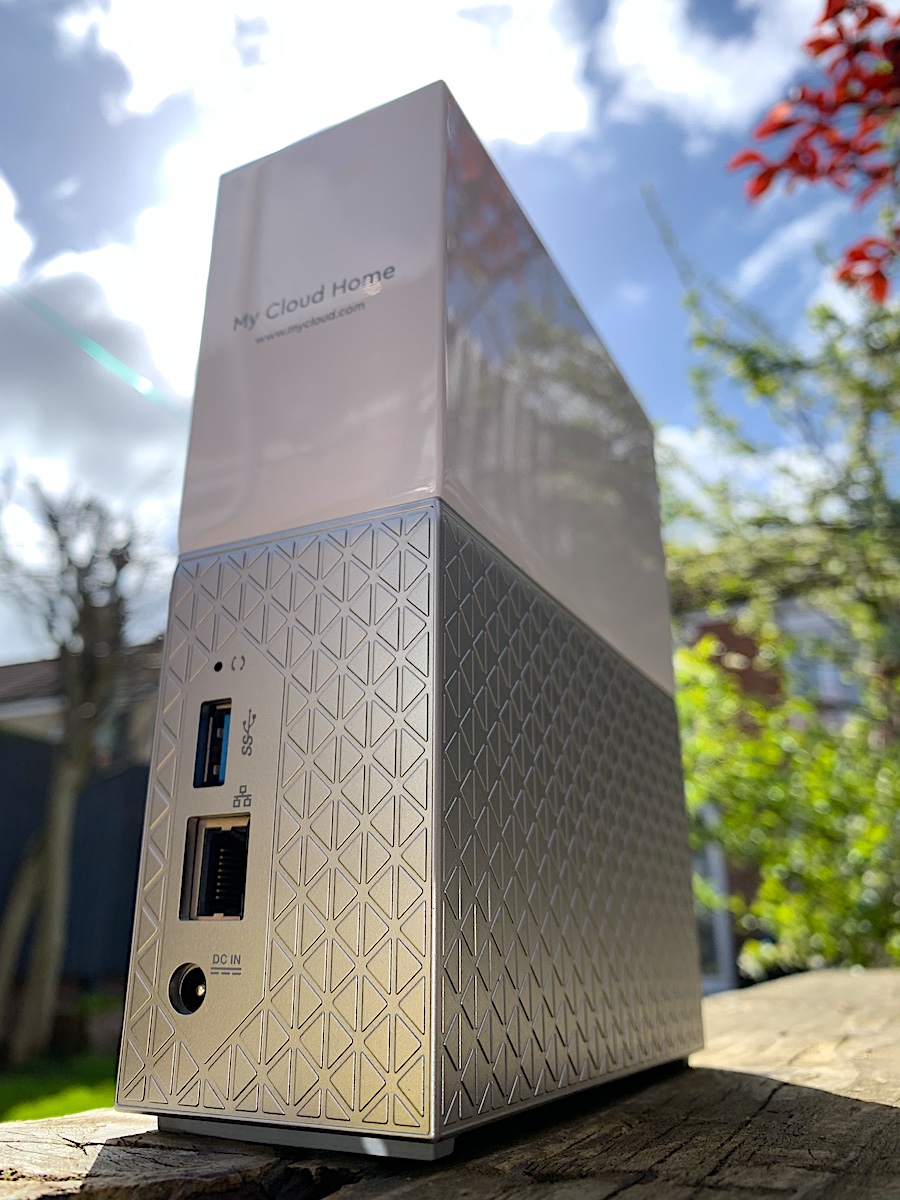
In the last few days, we’ve heard that hard drive manufacturer Western Digital have suffered a major outage with their web services. Unfortunately due to the way these NAS drives use a web service to login, it means when the web service is down, you cannot login to your own device.
Nobody knows if WD can bring the service back online at some point, or how long that could take. In the meantime, we’ve now recovered a few of these drives, so if you need access to your data, get in touch.
In the last few years, soldered storage has gone from a strange Apple quirk, to a standard way of manufacturing laptops. There was outrage when apple first started soldering RAM and storage, but you’ll now find soldered SSDs in laptops from Microsoft, HP, Dell, and any other manufacturer you can think of. That’s not to mention all the millions of phones & tablets with soldered storage.
Benefits
From a manufacturing point of view, soldering the SSDs makes sense. Fewer “bulky” connectors on the motherboard can lead to thinner and lighter computers. Because a 5mm thick laptop is just not thin enough! There are also performance benefits by integrating the components closer together. See the PlayStation 5 and M1/M2 Macs for examples of that performance taken to the extreme.
Recovery Problems
But there are huge downsides to soldered storage when things go wrong. You can’t just whip out the SSD and access the files. And even if you went to the trouble of desoldering the chips, you’ll often find they are encrypted. In some cases the only way forward is to attempt to repair the original damaged motherboard, or transfer numerous undocumented components to a working replacement board. Lack of schematics from the manufacturers mean this type of work is often time consuming, and therefore expensive.
E-Waste
Even ignoring the problems with recovering data from soldered parts, there is a new problem of electronic waste. When a pluggable SSD or RAM module fails, it can be replaced. If those parts are soldered to the board, you’re probably sending the whole thing off to landfill, or “recycling” as it’s sometimes known.
Solutions
The number of recovery options are as varied as the devices themselves. If you have a faulty device with soldered storage, get in touch. In many cases there are ways to recover the data.
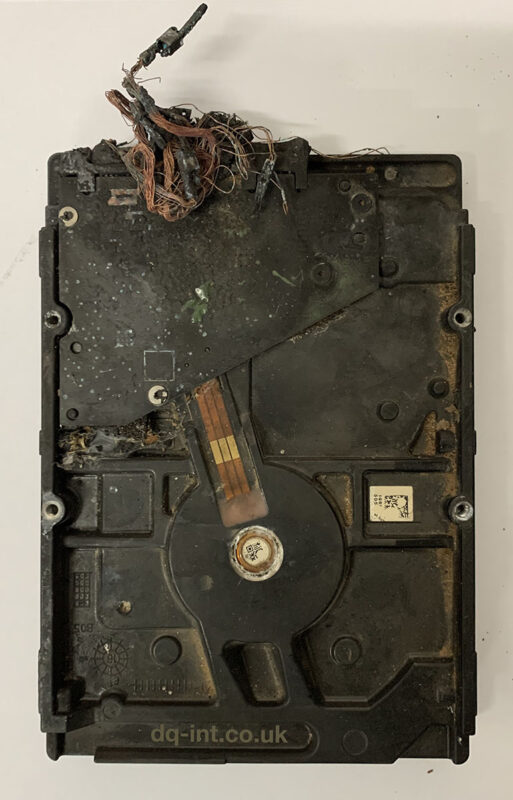
We recently completed an extremely difficult recovery from a fire damaged hard drive. The drive was stolen from an Annke CCTV system during a burglary and then set on fire.
This is what we received:
Photo of a burnt Seagate Hard Drive
Despite looking like it had fallen from space, we could recognise that it was a Seagate drive. Most of the label was burnt off.
Where to start with the recovery
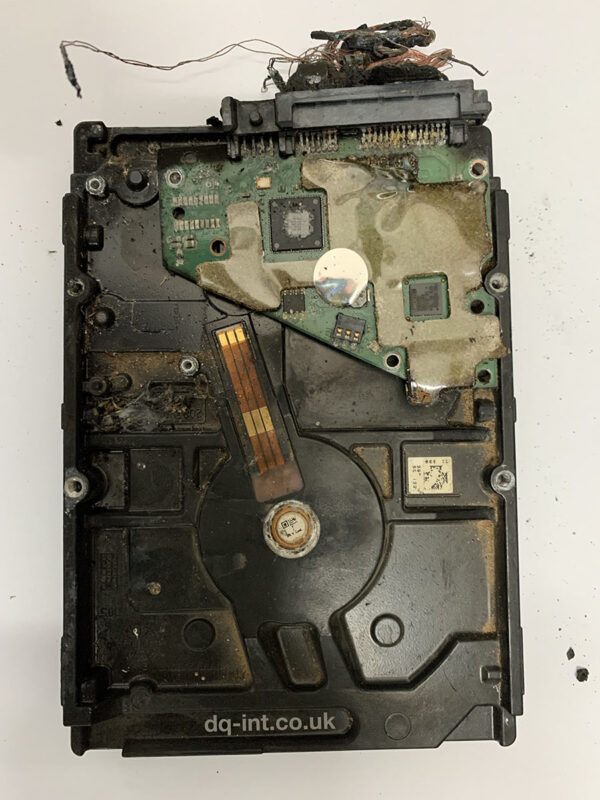
It’s easy to get overwhelmed by a case like this, but it’s important to break the problem down into manageable chunks. First we needed to extract the unique information from the circuit board (PCB). The board was black and charred from the outside, but the delicate underside was still green, and it looked like the main components survived. With a little bit of a clean-up we were able to read the required info and transfer it to a suitable (non-burned) donor board.
Seagate Burnt Circuit Board (PCB)
Next, we needed to turn our attention to the inside of the drive. We gave the outside a thorough clean first, to avoid transferring contamination inside. Then we opened up the drive to assess the damage. The gasket between the top cover and main device had turned to a gluey mess, so we had to be careful separating the two.
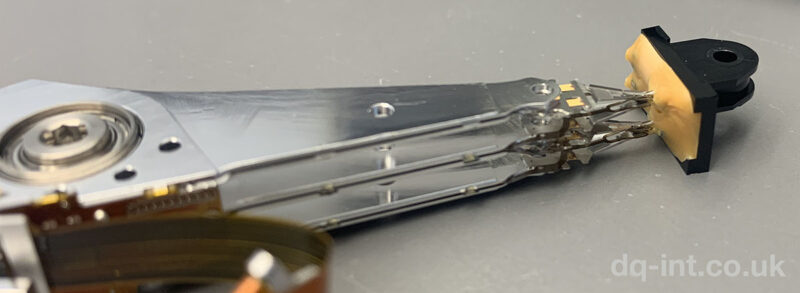
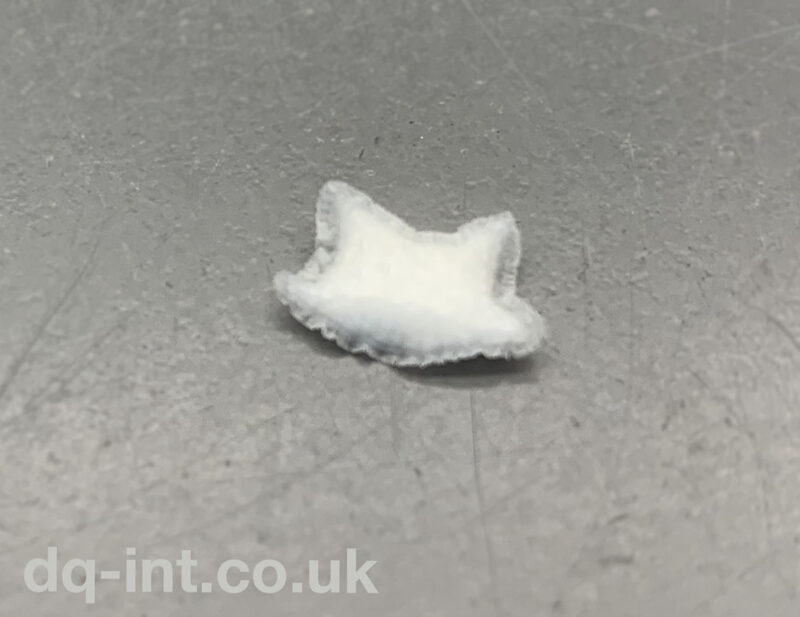
It’s important to point out that we haven’t attempted to power up the drive so far. Spinning up a drive in this state will never end well, and it’s a good job we didn’t. The heads were melted into a plastic blob that was once a parking ramp, and the particle filter was transformed into a stiff little pillow. By some miracle, the discs (platters) themselves were in surprisingly good condition. The pack of discs was also turning freely, so the motor was not stuck.
Seagate heads melted into their parking ramp
We replaced the filter with one from a similar drive, but the heads would be the real challenge. It wasn’t possible to read the exact label information (it was burnt off), so confirming a match for a suitable donor was a challenge. We could read some of this missing info from the circuit board that we’d backed up earlier. There was another worrying sign on what was left of the label. A warning that the Warranty was valid only in China, and Exclusive to China. We worried about trying to source such a drive if it was only intended for the Chinese market.
Shrunken particle filter
We did find a suitable donor, and installed the new heads and parking ramp into the drive. We also borrowed the new top-cover as it was clean, and still had a proper gasket.
Moment of truth
The drive came ready, and although it was reporting some problems, allowed basic access. We were able to carry out our usual Seagate process, and start cloning sectors to another drive. This process went extremely well, and only tripped up a handful of times. In the end after multiple passes, we had skipped just 100MB of the drive due to errors, and successfully extracted the 2-3TB of CCTV footage.
In total, the whole process took just under three months, mostly due to delays finding a suitable matching donor, and then the careful imaging process.
The best part of the story is that the burglar was clearly visible in the footage so will hopefully be brought to justice.
The last time we posted about these drives was 2015, and we’re seeing another surge of these drives failing again.
In the past week alone, we’ve seen two separate pairs of RAID mirrors (four drives total), an iMac Fusion Drive, a standalone iMac drive and an external Seagate backup drive from a PC. All failed with no known impact, and all unrecoverable due to media damage.
What is media damage?
In a hard drive, the discs are the media, and damage is caused by impact from the heads or another internal part. Usually this takes a certain amount of force and will be the result of the drive being dropped or knocked over. For some reason, these Seagate drives seem to also succumb to damage without any known impact.
ST1000DM001 RAID Disk
Is it just a head crash?
Yes it is. However head crash is a very specific term that has now been abused to mean many other general faults. It’s very common to hear people talk about a crashed hard drive, when all they really mean is the drive is not accessible.
Is this unusual?
For other common hard drives, when parts wear out or fail, it doesn’t usually result in media damage. Often we can replace the heads and get the drive running, at least well enough to extract the data one last time. Dropped drives always run the risk of media damage, but drives do have protection from such impacts, so it’s always worth pursuing if the data is important.
What’s the answer?
If you’ve already got a failed Seagate drive, get in touch with us ASAP, as there really is a limited window of opportunity to get the data back when these fail. Recovery is possible if we get them soon enough!
If you’ve got any of these drives installed anywhere, it’s probably a good idea to backup and migrate over to some new disks as soon as you can. We don’t give specific brand recommendations, as we strongly believe in running a full-time backup regardless of the disk you choose. In an ideal world, any disk you own should be replaceable without any loss of data by loading from a backup.
Disks to watch out for
ST2000DM001
ST2000DM006
ST3000DM001
Seagate Barracuda
Seagate Desktop Hard Drive
There may be other similar model numbers too. These are particularly risky in consumer RAIDs, as it’s common to either not notice when the first one fails, or to get two failures in quick succession.
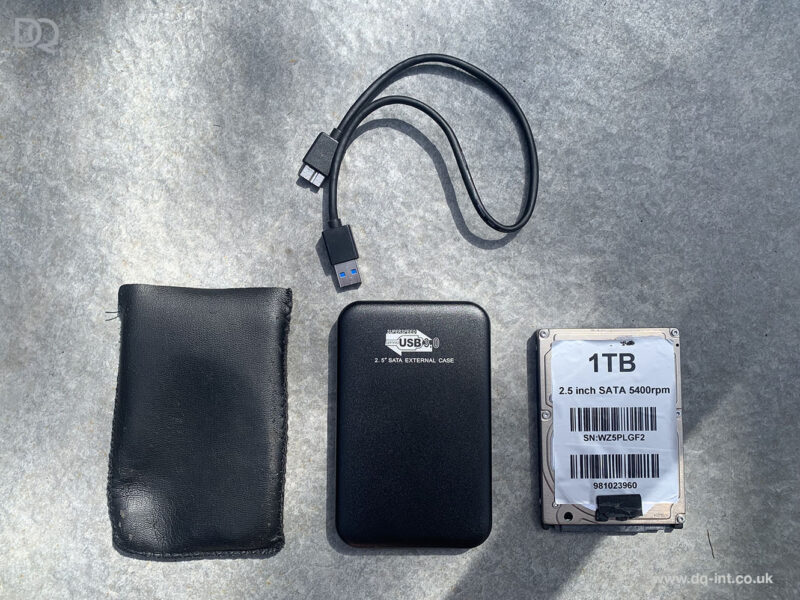
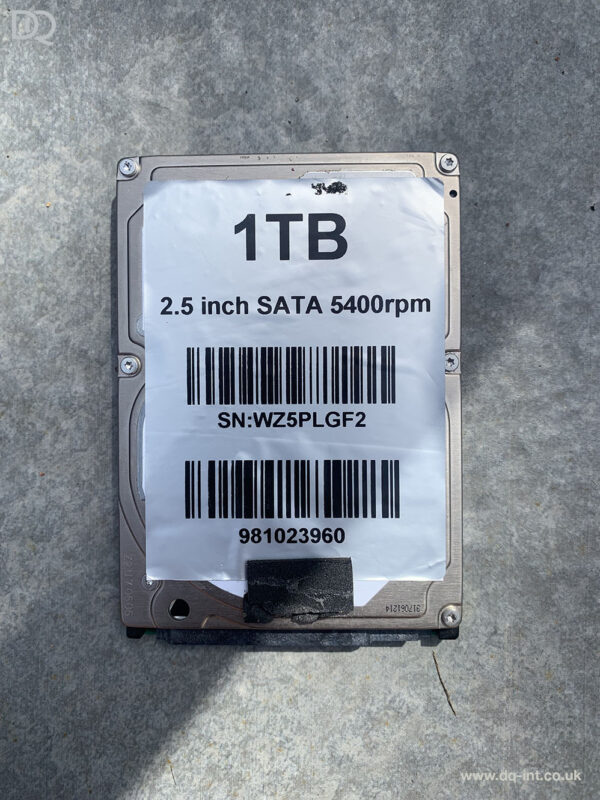
The saga of fakeeBay and Amazon products continues. This latest instalment was supposedly a 1TB USB External Hard drive that had failed. The client didn’t suspect anything unusual about the drive until it failed, so sent it to us for diagnosis. When we removed the drive from the generic external case, we found a drive with an extra plain label over the usual manufacturers label. This is not unheard of, but is unusual, and made us a bit suspicious. We peeled back the plain label, and underneath was a 120GB hard drive, that looks like it was pulled from an old HP laptop.
FakeRealFakeRealThe Rogues Gallery. Watch out for these!
Upon connecting the drive to our diagnostic kit, the drive had a problem in the firmware area and couldn’t reach a ready state. In other words, the data was not accessible. After a lot of head scratching and tweaking around with the firmware, we found the fault and got the drive into a ready state. That’s when we noticed the model number didn’t match the label. Also the hard drive was identifying itself as 1TB, even though we know it was only 120GB.
Real
Fake
Model
ST9120822AS
ST1000LM024
Capacity
120GB
1TB
Real vs fake drive info
There were a few bad sectors during the image process, but that’s not surprising when you consider it had possibly been in use since around 2007. All customer data was successfully recovered.
As usual, our current advice when buying storage drives online these days is as follows: Go for brands you know. Check you’re not getting too-good of a deal. If possible, fully test the device using a manufacturer’s tools before you trust your data on it. Most manufacturers provide free tools to test their own drives.
Our data recovery process almost always begins with a copy process. Otherwise known as cloning or imaging, we attempt to copy every data block from the failed disk to another disk.
With a normal disk, we can record how long it takes to copy a block, then multiply by the total number of blocks to calculate how long the process will take.
Cloning a Normal Disk
With a faulty disk, this is not possible. A faulty disk will often read different blocks at different speeds depending on how bad the problem is. Until we read the block, there’s no way to know how long it will take. This is illustrated in the animation below. (Sorry, the GIF below is quite large so may take a while to load.)
Cloning a Failed Disk
With a faulty disk, we have to keep copying blocks until we get all the data. You can see from the animation above that it’s impossible to know how many slow blocks are coming up, versus good blocks.
This is the third part of a mini-series about copying data.
I assume this Kimsnot card is meant to be a fake Kingston SD card, although it appears to steal more of the visual design from a SanDisk Extreme card. This SD card was sadly used to photograph a wedding, and unsurprisingly to us, only the first 16GB of photographs are readable. The rest are lost forever, because the other 112GB just doesn’t exist. The card reports 128GB of useable space, but anything above 16GB gets written into thin air. You don’t even get an error until you try to read back the files later. We’ve seen all sorts of fake capacity storage, and despite clearing them out every once in a while, Amazon and eBay are back selling them again. And just in time for all the new cameras, phones, and computers people will be getting for Christmas!
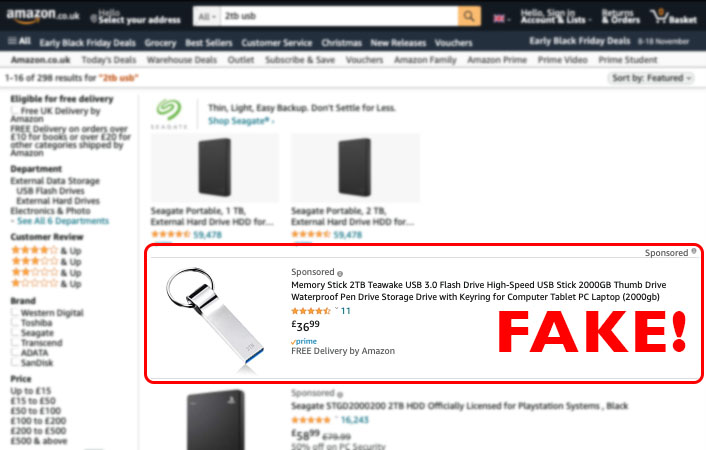
Fakes are usually sponsored listings, so look for the sponsored tag.
Fakes are usually cheaper than everything else, but not always
Fakes can be brands you’ve never heard of. Making storage devices is expensive business, so you’ve probably heard of the genuine companies.
Spelling or specification mistakes.
Buy from trusted sellers only. You’re less likely to buy a fake card from Argos, John Lewis, Currys, or even a supermarket!
The fakes usually work to a point, but with worse performance, and not to the full capacity. Try to fully test the device across the whole storage before you trust it. Fakes commonly have 32GB or less real storage, so make sure to test writing & reading above that size.
How bad is it?
I’ve just this second run a few searches, and get fake products as the first result. In the case of ebay, it’s the top result of 1,522, and appears directly above a genuine hard drive.
eBay Fake 1TB Portable DrivesAmazon Fake 2TB USB Drives
We don’t often get much call to recover CDs anymore, but this recent case was interesting. We received a set of five CDRs labelled image library backup 2002. The user had no idea what software created them, and just a vague memory that they may have been burned from a Windows 98 PC.
Step 1… Read the discs
As usual, our first task is to read all the discs, and in this case save them to image files (ISO / Bin Files) for scanning later. Due to their age (19 years!), I expected this to be the hard part, but all the discs read well. Good work pink Verbatim DataLifePlus®! In fact there were just six unreadable sectors near the end of the final disc. This seemed like a good point to begin the next phase, and actually see what files I could get from them.
Where the problems start
Mounting the disc images, just showed a single, (un)helpful file.
Backup CD. This is a backup CD. Except for this file the contents of this disc must be accessed using your backup software
Readme.txt (2002)
The reason for such a vague message became clear later. The companies behind this software went through a number of years where they were sold, resold, sold again, rebranded, you name it. I suppose the generic message saved them having to update the code for every different version of the software.
Hex editing
I had a bit of a poke around inside the image files, to look for clues. Aside from the text above, the vast majority of the discs looked like compressed data. This is bad news if you don’t know what compressed them! There were a few little nuggets of metadata, and a few promising repeating strings. These strings lead me to this page. There were some similarities between my disc images, and the example headers from Will’s Zip Disk images. I tried the tools provided by Will, but couldn’t get them to work with my files. I contacted Will to see if he had any ideas, and he was extremely helpful and interested in the project.
The old web
In 2002, it was far more likely that you got your software on floppy disks or CDs, and your tech information from a paper magazine. Anything that was written online back then, has largely fallen into digital disrepair, or disappeared altogether. I’ve never seen so many 404 error pages than when I was trying to research these backup discs.
Think Different™
I’d seen a screenshot of a similar looking readme file, and that post mentioned Backup Exec. I’d heard of Backup Exec as a more recent tool for servers, but didn’t realise it started out as a simple tool to backup Windows PCs to removable media. After trawling though pages of dead links, I eventually found a couple of old versions of backup exec on archive.org. There was even a version named “Seagate Backup Exec for CD-R, Version 5.4” from 1996. It all started to seem so easy.
Spin up the VM
I booted a Windows 98 Virtual Machine, and installed the Seagate version of Backup Exec for CD-R. After a required reboot, the VM failed to boot, so something was incompatible. Old VMs like this can be temperamental, so I didn’t go any further trying to track down the fault.
A problem shared
I was speaking to a friend about this case, as he’d been a Backup Exec user more recently. He didn’t have any other suggestions for me, but after our chat, he sent me a couple of links he’d found. This one in particular mentioned another bit of trivia about the software companies. Apparently another company Stomp Inc once used the code from Backup Exec in a Windows tool called “Simple Backup.”
Back to archive.org, and I found a copy of version 4.61. Had to be worth a try.
I installed this on the Windows 98 VM and rebooted… I half expected it to corrupt the VM again, but this time it booted up fine. Simple backup launched with a Veritas logo animation and then successfully read and restored the CDs. The job was complete. The software was even smart enough to cope with the couple of missing sectors on disc 5.
In total, I extracted around 3.5GB of photos.
Not over yet
Although I’d successfully extracted the files from the backup, they were now trapped inside the Windows 98 VM. Usually VMs can communicate back to the host, but Windows 98 doesn’t easily work that way. To avoid messing around too much, I decided to just mount the virtual disk from Windows 98 to a Windows XP VM, which does have support for sharing files with the host. That got the data back out into the real world!
We’ve started to use an open source file listing tool, to make it easier to check though the recovered data before we send it to you.
We’ll send you a zipped html file, with your job number as the filename. Something like “211111-File-List.zip“. Inside is a similarly named file ending “.html” which is a web page and can be opened by a web browser on a computer.
You should see your folders listed on the left, and can click to navigate though the subfolders. A picture paints a thousand words, so see the example below.
FAQ
Why can’t I open the files?
This is just a visual list of the files, it doesn’t actually contain any files.
The file is stuck at “Loading…”
iPhones don’t easily allow you to open the html file so you should open it on a PC or Mac if possible. We’re working on a solution for this at the moment.
There are missing files
If you can’t find specific files, there is a search tool at the top. If that still fails to show your files, let us know. Maybe the listing process has missed some files, or maybe we have other recovery options available.
There are extra files I don’t recognise
The recovery process can sometimes unearth hidden, deleted, or duplicated files. You can usually ignore them, and we usually filter out as much junk as we can.
Any other questions?
Get in touch, and we’ll help.
Credit to RL Vision for their handy tool Snap2HTML, which is the basis for this feature.
If you’ve been having computer problems, you may have been asked for your Bitlocker key. In most cases you won’t be able to access your files without this key. Even if you know your login password!
Bitlocker should never be enabled without a backup of the key, but there are cases when that can happen by mistake. Fortunately the keys are usually saved into your Microsoft account, or other corporate network account.
Where to look?
For a list of ways to find your Bitlocker keys, see the official guidance by Microsoft. In particular, you should login to:
Your own, or any other Microsoft accounts that were ever used on your computer here.
Any work or school accounts that were ever used. Try to login with your credentials here.
If you had a friend or relative setup your computer for you, ask them if they made a copy of the key, or ask them to check the links above to see if your key was saved automatically into their own account.
You’ve found the key, now what?
Finding the key is only part of the solution. In normal operation you shouldn’t need to type your Bitlocker Recovery Key very often (or ever really). If you’ve got back in, it’s a really good idea to make a backup of your files ASAP. You may be in the middle of a bigger problem.
If the key is not accepted
If you’ve found the key in your Microsoft account, but the key is not accepted when you type it, you may already have an underlying disk problem. Keep the key somewhere safe, and then contact us about data recovery. We’ll need to recover the drive first, and then decrypt it using the key.