Author: Dan Dilloway

  • Meltdown and Spectre Data Recovery

    Meltdown

    More than enough has been written about the Spectre & Meltdown CPU vulnerabilities so I won’t go over them directly here. If you’d like more info, I’ve included some links at the end.

    My interest is more with the trouble caused by the intended fixes. Despite CPU manufacturers testing the fixes for some months, in certain circumstances they are causing random reboots, and other performance problems.

    Safely Remove

    Spectre
    To “Safely Remove” a disk is standard practice to avoid filesystem corruption. In simple terms, the computer stops writing to the disk and then you’re safe to unplug it. In the case of a random reboot, the computer doesn’t get the chance to finish with the disk.  A crash at a critical moment can damage the filesystem and render the machine un-bootable. Even if the system can recover itself, if you crash enough times your chances of trouble increase. It’s hard to trust a system that could randomly reboot at any moment.

    A Solution?

    Until we get fixes from the manufacturers, there’s not much else we can do. Now would be a really good time to make sure your backups are working and up-to-date. These fixes could take a while to stabilise, and in the meantime you could be one random reboot away from data loss.

    Sources

  • Add Another Time Machine Disk

    If you need to add or change your Time Machine™️ backup drive, the process is pretty simple. Plug in a new disk and make sure there is nothing on it that you need. In most cases Time Machine will ERASE the disk before using it! You have been warned.

    Now might be a good time to find the disk on your desktop and rename it to something obvious like “backups” for example.

    Next, open Time Machine Preferences from the Time Machine menu. If you don’t have the Time Machine icon near the clock, you can also find the settings within “System Preferences”.

    Open Time Machine Preferences
    Open Time Machine Preferences
    Click Add Or Remove Backup Disk
    Click Add Or Remove Backup Disk
    Select the New Disk
    Select the New Disk

    Click the “Use Disk” button, and Time Machine will start making a new full backup to this new disk. This may take a few hours.

  • Mislabelled Apple Hard Drives MK3253GSX MK1653GSX

    I have a particularly nerdy Apple rabbit hole to share with you today involving the labels on Apple hard drives. At some point around 2007-2008 Apple started re-labelling the hard drives used in their computers. I’m pretty sure the hard drives in black & white MacBooks were standard white labels with an Apple part number (655-XXXX) printed on them. Now disks feature a black label with white text. Not particularly exciting, but maybe somebody (Jony?) wanted the disks to match the fancy black circuit boards now used in all Apple hardware. That’s the sort of attention to detail we’ve come to love from Apple devices. Whatever the reason, this has resulted in a batch of Toshiba drives in circulation with incorrect information printed on them. I assume these are the result of a simple ⌘+C, ⌘+V error. My speculation is that after printing the labels for the 320GB disk nobody remembered to change the text for the 160GB version.

    For reference MK3253GSX is 320GB and MK1653GSX is 160GB. In Apple’s world, both disks use MK3253GSX on the label, even though the correct number is shown when you check Disk Utility or About This Mac > System Information.

    This wonky number business all came to a head ? when we were looking for replacement parts for one of these disks. We needed the double headed 160GB drive, not the four headed 320GB.

    Mislabelled Apple Hard Drives MK3253GSX MK1653GSX
    Mislabelled Apple Hard Drives MK3253GSX MK1653GSX

    When I was trying to research this, I was quite suprised to find an old blog post of ours that shows the same problem with Hitachi drives manufactured around the same time. I’ve not found any other mention of this labelling fault, so thought I’d post it up here for future Mac Archaeologists to find.

  • Bent iPhone Data Recovery

    Bent iPhone Data Recovery

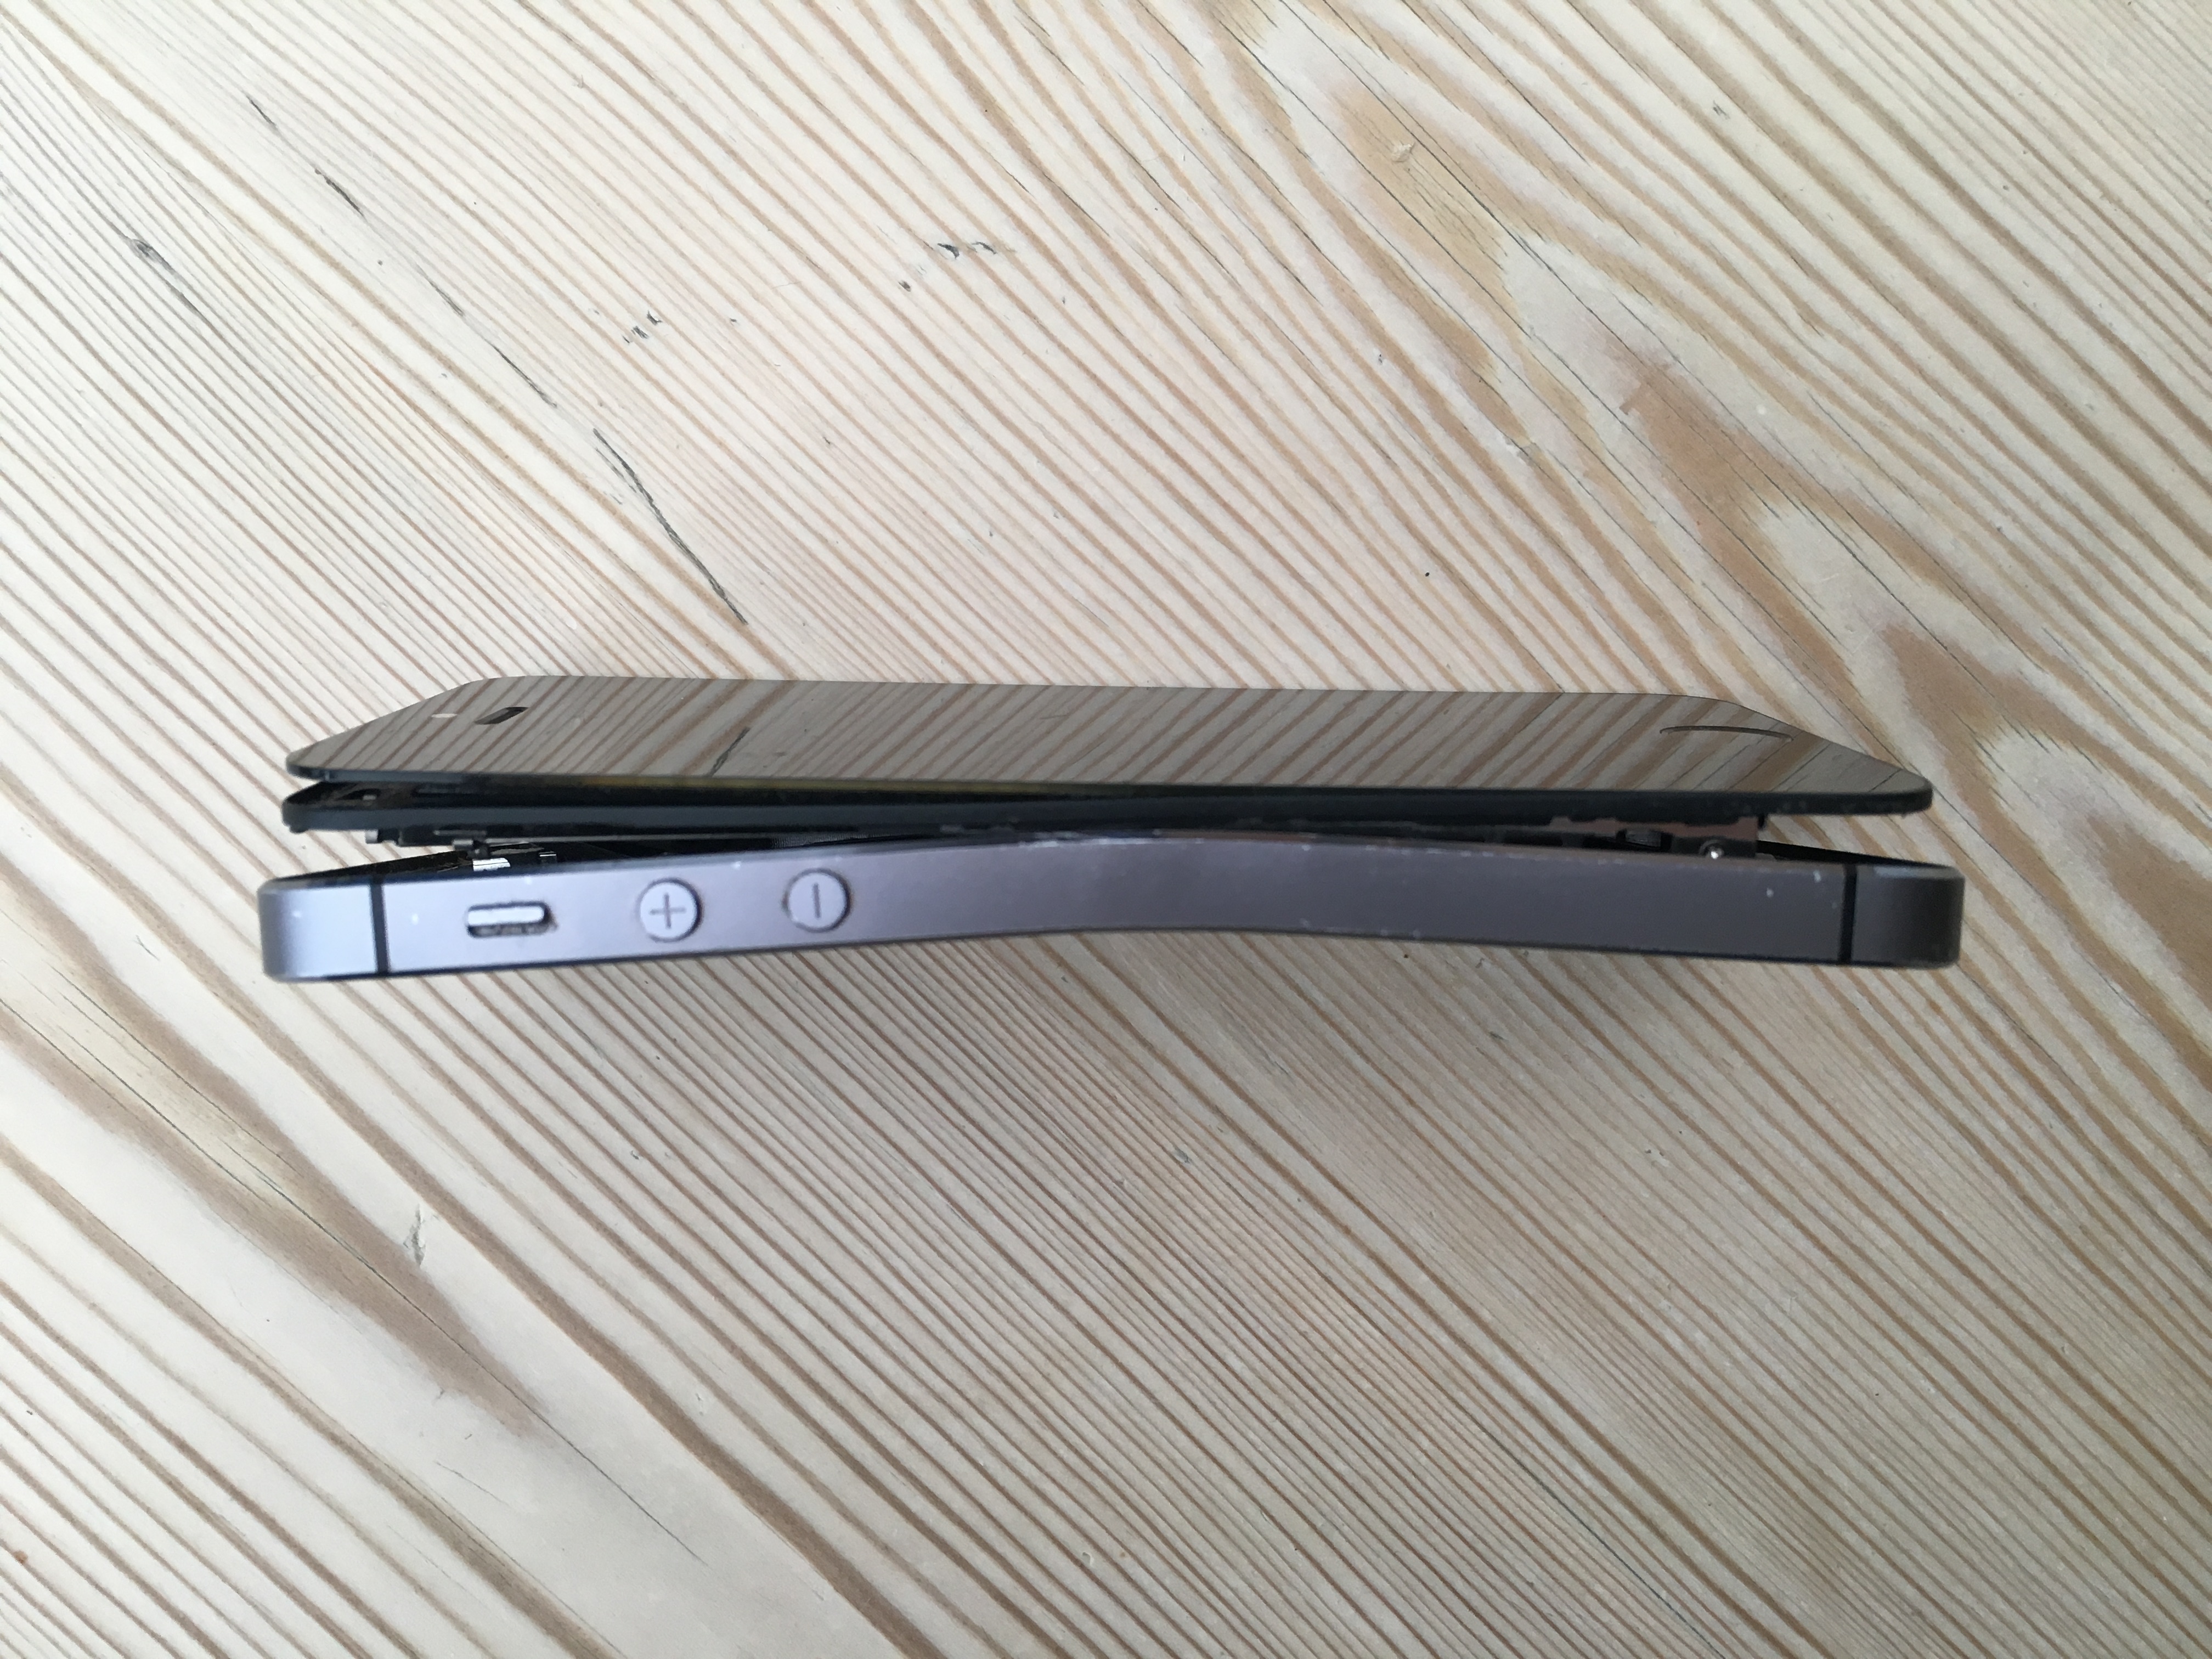
    We’ve had our fair share of unusual and difficult recoveries over the years, but I have to share a photo of this bent iPhone we recently recovered. It’s an iPhone 5s that has seen better days. I’d love to know how anyone could bend a phone that far without also smashing the screen! It’s impressive.

    As always, my first concern was extracting the damaged Lithium battery. I removed that straight away and disposed of it before starting the recovery.

    With a bit of TLC and a new battery and screen, the phone was just about working. It stayed working long enough to get an iTunes backup, and extract all the data.

    Bent iPhone Data Recovery
    Bent iPhone Data Recovery
  • Backup Your Data. It’s Not As Tough As You Think

    Backup Your Data. It’s Not As Tough As You Think

    According to the latest Backblaze survey, 21% of people have never made a backup of their files. The figures show a gradual increase in backups since 2008, but there’s still at least one in five people 🙋‍♂️🤦‍♂️🤦‍♂️🤦‍♂️🤦‍♂️ that are risking total data loss. And more than half of the people surveyed had no recent backup.

    Fortunately technology has changed a lot in the last few years. There are a whole host of  companies that offer free cloud storage. Large capacity, fast, and cheap external disks have also made backups at home easier. Software improvements in macOS and Windows have made backups automatic, so there’s really no excuse these days. Don’t wait until it’s too late!

    A Quick Guide To Making Backups ?

    Identify the files you can’t live without. These might be a few spreadsheets, some word documents, your thesis, anything irreplaceable. These are the files you’d grab if there was a fire. Forget photos for now as I’ve tackled them separately below ⬇️. If these files are small text or office documents, use something like dropbox or google drive to keep them synchronised in the cloud. An added bonus is this data will also be available on your other devices like iPads, iPhones or other computers. These cloud hosts give away a small amount of storage for free, so you might as well use it!

    Photos deserve a bit of special attention here. Photos and videos are often the largest files for home-users, and will usually be well over the limits of free cloud storage. Fortunately both Apple’s iCloud and Google Photos can take care of them. Google Photos will take an unlimited number of photo uploads but limits the size of single files. The size limits are fair for most home users, especially if you just use a smartphone and not a fancy camera. Although not free, the price for extra iCloud storage is pretty reasonable too – £0.79 per month for 50GB at time of writing. If you are an iPhone user, the iCloud option has other benefits like device backups, data sharing with Macs, iCloud Keychain etc.

    Once you have one of these options set up, it’s a good idea to keep an eye on it for a while and make sure the files are being copied over. You can login to all of these services from a computer and have a look at the files stored on there.

    The Whole Hog™ Whole Hog

    Now you’ve sorted the important stuff, It’s probably worth going the whole hog and also making a local backup. Don’t worry, it’s not difficult, and once you’ve set it up, you hardly have to think about it again.

    Mac Users ?

    If you plug in a new hard drive, macOS will ask if you want to use it with Time Machine. BEWARE that this will usually ERASE the disk and DELETE any data that’s on it! If that’s what you’re trying to do, click YES! Time Machine will then make a backup of your whole Mac. The first backup can take hours to finish so try to leave the computer on until it’s done. Once it’s finished, Time Machine will make regular backups as long as the disk is plugged in. These smaller backups just copy over new changes so don’t take as long.

    Recent versions of Time Machine will happily make backups to multiple disks if you have them. You could keep another one in a safe or at work, and bring it back periodically to update itself. Time Machine will figure out where it left off, and fill in the gaps.

    If your Internal disk ever fails, you can use the Time Machine backups to restore everything, including Applications and settings. You can also recover single files at any point if you ever need to.

    Windows Users ?

    Windows 10 has an automatic backup process too. It’s a little buried inside the settings, but once it’s set you can (pretty much) forget about it. I find the fastest way is to click the “Start Orb” and type “backup” into the search box. You want to choose “Back up with File History”. This should take you into the File History page inside Settings. Click “Add a drive” and select your external drive. Windows will now keep extra copies of your data files on that disk. The default options will backup things like Photos and Documents, as long as you store them in the standard Windows folders (which you should always do anyway!).

    File history will only save your data files, so if the computer fails, you’ll need to get it up and running again before you can load the files back on. It’s worth checking if you have the original disks, or even seeing if you can create rescue disks. (It depends on your system). The “Backup & Restore (Windows 7)” program allows for a full system backup, but in my experience, this process is much more prone to errors, and also takes a long time to complete the backups.


  • Stuck MacBook Trackpad Bulging Battery

    If you have a MacBook or MacBook Pro that’s a few years old, you might have a problem hiding right below your fingertips. If your trackpad has become difficult to press, or stopped clicking all together, you could have a dangerous faulty battery. In MacBook & MacBook Pro laptops, the battery is directly below the trackpad. When the battery fails it can expand, pressing into the bottom of the trackpad.

    Stuck MacBook Trackpad Bulging Battery
    Stuck MacBook Trackpad Bulging Battery

    Explosion?

    I’m not sure quite how risky these batteries get, but they almost double in size. Standard battery advice says don’t pierce or burn but when these battery start expanding they could easily get punctured. I saw one so bad last week that the bottom case and trackpad were being pushed apart. (see photo below)

    Bulging Battery From A MacBook
    Bulging Battery From A MacBook

    Check

    If you click the battery ? icon near the clock at the top-right of your Mac screen you can check the status. (If you don’t see the status, press the option (alt) key before clicking the battery icon.)

    MacBook Service Battery
    MacBook Service Battery

    From Apple’s help document

    You may see any of the following conditions:

    • Normal: The battery is functioning normally.
    • Replace Soon: The battery is functioning normally but holds less charge than it did when it was new.
    • Replace Now: The battery is functioning normally but holds significantly less charge than it did when it was new. You can continue to use the battery until you replace it without harming your computer.
    • Service Battery: The battery isn’t functioning normally, and you may or may not notice a change in its behavior or the amount of charge it holds. Take your computer in for service. You can continue to use your battery before it’s checked without harming your computer.

    What Next

    If your status shows Replace Now or Service Battery, I would look to get the battery replaced as soon as possible. At the very least, a bulging battery could cause cosmetic damage to your Mac. At worst it could potentially leak or catch fire ?.

  • SQL Database Data Recovery In Hampshire

    Despite falling out of favour in giant tech companies, there are not many businesses in the UK that don’t use some sort of SQL database. Whether that’s a website running WordPress & MySQL or an intranet hooked up to an MSSQL DB, SQL is still everywhere. Even iPhones use SQLite to store Notes and other data inside apps.

    SQL Database Data Recovery In Hampshire
    SQL Database Data Recovery In Hampshire

    On Disk Problems

    Sometimes the fault lies with the underlying disk, Virtual Machine, or RAID array that the file is stored on. First we solve the disk problem and then extract a working copy of the database.

    Inconsistency

    Another issue with database files is that they can go corrupt silently, and you might not notice until hours, weeks, or months later when a crucial process fails.

    Our SQL recovery tools, alongside our hard disk & RAID recovery services can help get your lost databases up and running again with minimal fuss & downtime.

    • Peter MorganThese guys are amazing!! Really helped us out in an impossible situation with a corrupted SQL database which even the software provider couldn’t fix. Not only did they fix the corruption but they did it quickly and super professionally keeping us informed at every step of the way. I have used Dataquest many times and over the years and they always deliver. 4th July, 2017

    Common Applications We Recover SQL From

    • Web server MySQL, PostgreSQL
    • Windows Application MSSQL
  • Why You Should Never Open A Hard Drive

    See our video below to find out why you should never open a hard drive.

    Transcript

    Instead of a needle, hard drives use tiny magnets to read and write data. The heads don’t actually touch the disc.

    But you’d only see that if you got close

    Super close

    The heads float just three nanometers above the disk

    In comparison, a spec of dust in the air is 166 times bigger than the gap.

    It would be like trying to kick a football through a gap the size of an ant

    So if that giant spec of dust can’t fit through the gap, it will hit the read head

    Bouncing it into the disc spinning at over 100mph

    And scraping away chunks of disc within seconds

    Up close the tiny scratches look like mountains

    The heads can’t get past the damage so just scratch it even more

    Until there’s nothing left but dust

    This is what we call a head crash

    Why You Should Never Open A Hard Drive

    And This is Why You Should Never Open a Hard Drive! (Unless You Have a Cleanroom)

    Contact Us Now…

    For a fast reply from a real person.
  • How To Troubleshoot Western Digital Elements External Drive

    How To Troubleshoot Western Digital Elements External Drive

    Elements is the basic brand of external drives from Western Digital. These no-frills disks are usually great value, but when they fail have a few quirks that can make recovery a little awkward. For example the small pocket sized drives usually have a soldered USB port that cannot be removed. There is also automatic encryption, even if you’ve never set a password.

    Symptoms of WD Elements Failure

    • LED permanently lit / blinking
    • LED not lighting at all
    • Clicking / ticking noise
    • Disk is not formatted. Do you want to format it?
    • Unable to see your data in Windows or macOS
    • Unable to copy or read files

    Troubleshooting Ideas

    If you have problems with a WD Elements drive, you should make some checks to see if you can narrow down the fault. Be aware that opening the external drive case will probably void your warranty with Western Digital. If there is important data on the drive you should seek professional data recovery advice before you try anything.

    That’s the warning out the way, so lets have a look at some troubleshooting.

    1. First check all cables are plugged in securely, and not damaged or frayed. If you have an identical spare cable you can try it, just be gentle.
    2. If trying a different power supply, make sure the voltage matches exactly. Amps can be higher but not lower.
    3. There is little point dismantling a WD Elements drive, as there is usually no SATA connection inside. Even if you manage to bypass the USB Port, your data will be encrypted.
    4. It’s worth plugging the external drive into another computer. If it seems to work you should copy the data off straight away. The drive could still be faulty & fail again soon.
    5. Whatever you do, don’t dismantle the actual hard drive. Hard drives are built in controlled clean-air environments and even the smallest spec of dust can cause permanent damage to the drive.
    6. These external drives are quite unique in the way they work. It is not possible to replace the circuit board (PCB) on these disks, as your PCB contains important encryption keys. On the offchance that a replacement PCB worked, your data would be scrambled anyway without access to specialist decryption tools.

    If you are looking for a data recovery service for your external hard drive have a look at our external drive recovery services.

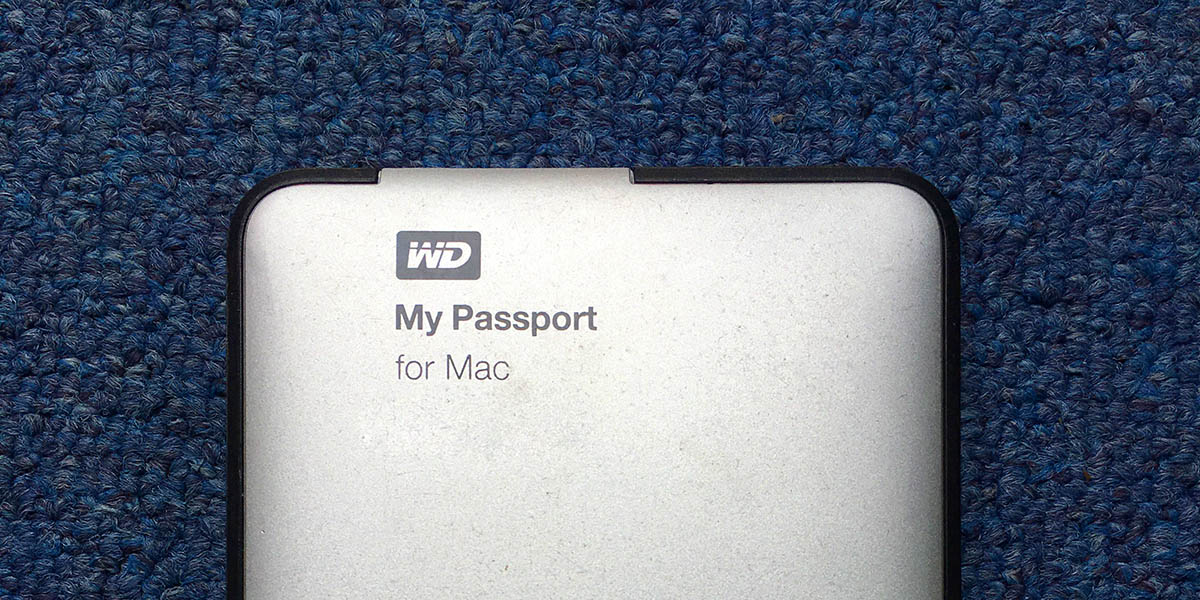
  • Troubleshoot WD My Passport External Hard Drive

    Troubleshoot WD My Passport External Hard Drive

    Unlike most external hard drives, WD (Western Digital) My Passport drives are more than just a simple wrapper around a regular hard drive. WD have integrated the USB port straight onto the main circuit board. This means if your external drive fails, you can’t easily remove it to attach to a PC.

    Symptoms of WD MyPassport Failure

    • LED constantly flashing / blinking
    • LED not lighting at all
    • Clicking / ticking noise
    • Disk is not formatted. Do you want to format it?
    • Unable to see your data in Windows or macOS
    • Unable to copy or read files

    Troubleshooting Tips

    If you have problems with a WD My Passport drive, you can make a few checks to see where the fault lies. Be aware that opening the external drive case will probably void your warranty. If there is important data on the drive you should seek professional data recovery advice before you try anything.

    That’s the warning out the way, so lets have a look at some troubleshooting.

    • First check all cables are plugged in securely, and not damaged or frayed. If you have an identical spare cable you can try it, just be gentle
    • There is no point dismantling a WD MyPassport drive, as there is no SATA connection inside.
    • It’s worth trying the external drive on another computer. If it seems to work you should copy the data off straight away. The drive could still be faulty & fail again soon.
    • Whatever you do, don’t dismantle the actual hard drive. Hard drives are built in controlled clean-air environments and even the smallest spec of dust can cause permanent damage to the drive.
    • These external drives are quite unique in the way they work. It is not possible to replace the circuit board (PCB) on these disks, as your PCB contains important encryption keys. On the offchance that a replacement PCB worked, your data would be scrambled anyway without access to specialist decryption tools.

    If you are looking for a data recovery service for your external hard drive have a look at our external drive recovery services.