Category: In Depth

This is the section for our longform, long reads & detailed articles. Usually (but not strictly) on a single subject, and longer than 400 words.

  • Common Data Recovery Myths Exposed

    Myth 1: When files are deleted they are gone forever.

    Fact: When files are deleted they are actually only removed from an index. Unless you then overwrite those sectors with new data, the files will still be there. If you delete a file it is important to stop using the computer. Even browsing the internet causes cache files and images to be downloaded to the hard drive, potentially overwriting the deleted files.

    Myth 2: Putting a hard drive in the freezer will bring it back to life.

    Fact: This is an old one, which will not die. We have never had to put a hard drive in a freezer. There is only anecdotal evidence that freezing a hard drive helps in any way. One of the most common types of hard drive failure is firmware corruption, which cannot be fixed in a freezer. I would be worried about introducing condensation into the drive, which could be devastating. If anyone knows where this idea came from, or how the freezer is supposed to help, then I would love to hear about it.

    Myth 3: The FBI can recover anything.

    Fact: The FBI are bound by the same laws of physics as we are. If a hard drive has had a head crash, and scraped the magnetic coating off the platter, there is no data left to recover. You cannot read magnetic data from particles of dust! Even the FBI can’t recover that.

    Myth 4: The best way to recover a hard drive is by swapping the platters out.

    Fact: In almost all cases, you should not disturb the alignment of the platters. They are manufactured within strict tolerances which cannot be recreated outside of a manufacturing environment. If the problem lies with the on-disk firmware, electronic components, or read / write heads, then swapping the platters would not solve anything.

    Note – If the spindle motor gets stuck then it can be necessary to swap the platters, but only as a last resort.
  • What Is Hard Drive Firmware?

    What Is Hard Drive Firmware?

    Hard drive firmware is the embedded software which controls the running of your hard drive. Most of it is stored within hidden sectors on the hard drive, and in normal operation you wouldn’t know it was there. Whenever you power up a drive, the firmware makes the motor spin, starts the read / write heads, and checks against a list of bad sectors. Only then will the computer be able to access the data area and allow you to see your files. If there is a problem with the firmware, the drive will get stuck and you won’t be able to access your data at all.

    Symptoms.

    Failed firmware is almost impossible to diagnose without specialist equipment. In fact, it is hard to confirm that the firmware is faulty at all. Many hard drive problems manifest themselves in the same way; by clicking, or spinning down, or just generally not being identified by the PC. You shouldn’t start changing components until you know where the problem lies.

    Repair.

    In the early days, most firmware could fit onto the electronic circuit board; simply swapping a damaged PCB with a good one was a common fix. Firmware is now too large to fit on the PCB, so the PCB contains just a very simple boot loader which starts off the drive and then loads the firmware from the disk surface. This means that swapping the PCB is no longer a common fix, and won’t work on most modern hard drives.

    We have specialist hardware and software that allows us to check and repair the firmware on most hard drives. We have also dealt with many of these problems before and have a huge database of previous experience to draw on.

  • Recovering Deleted Data

    In the vast majority of cases, deleted data is actually still lurking around on your hard drive. If you put data in the Recycle Bin or Trash, and them empty it, all you are actually doing is telling the system that it can reuse those parts of the disk when it wants. Until you replace those areas with new data, the old data will still be there.

    Recovering Deleted Data

    The Filing Cabinet

    The tried and trusted analogy is of a filing cabinet. When you delete a file, you are removing the index card from the front of the drawer, but the actual file is still in there.

    This is why it is really important to switch off your computer as soon as possible if you have accidentally deleted some files. You may not realise but even small actions like checking e-mail or browsing the internet can write cache files to the disk. That is when data could be lost.

    Overwritten / Deleted Data

    We often hear about the FBI being able to recover overwritten files. While this may have been possible on very old – low capacity hard drives (~100MB), it is unlikely to be possible on modern hard drives. The magnetic material is far too densely packed. Even then, it would only be tiny fragments of data recovered, and not whole files.

    The Problem With SSDs

    Solid state drives bring a whole new problem of their own. Due to the way the data is distributed around the device, known as wear levelling, you can never be sure of which sector you are writing or overwriting. Wear levelling is necessary to prolong the life of an SSD, but it means the drive could be moving data around behind the scenes, making deleted files much more difficult to track down.

    Specifics

    In most cases, we can recover deleted files with the original file names and folders. With deleted Mac data, this is often not possible. In that case we have to use a special type of scan, which finds all files of a given type and saves them to numbered files. This means camera photos may be recovered into a JPG folder, with files named like photo0001.jpg, photo0002.jpg and so on.

    If required we can process certain types of these files into more meaningful order. For photos we can arrange into folders by date taken, and for music files we can arrange into Artist / Album order.

    The Important Bit

    If you accidentally delete some files, they are likely to be recoverable. It’s the actions you take next which can make the recovery difficult – if not impossible.

  • Why RAID Can Be Bad For Business

    RAID is often touted as the silver bullet in data storage. Increased storage capacity, resistance from hardware failures and improved performance. While these are all valid upsides to a RAID setup, there are also a few downsides which need to be addressed.

    1. Extra Storage.

    RAID can allow for a huge pool of storage, but with that storage comes great responsibility. You should factor in at least enough capacity to backup the RAID data somewhere else. If you can only afford 8TB of storage then you should only use 4TB for data and the other 4TB to back it up; Preferably on another machine / standalone system.

    2. Redundancy.

    The first letter in RAID stands for redundancy. This means you can afford to lose a certain number of disks without losing access to your data.  This also means that if you have a disk failure you need to get it replaced immediately, otherwise you’re running without redundancy.

    3. Downtime.

    Nobody likes downtime. If your 16TB RAID array goes offline without a backup then you have a couple of options. One option is to attempt to get the RAID back online by replacing disks, rebuilding the array etc, but this is risky. If this is your only copy of the data then rebuilding / reformatting the RAID could corrupt the data beyond recovery. Don’t do this if you don’t have a backup to fall back on.

    The second and preferable option is to get the RAID professionally recovered. When we receive a RAID, the first thing we do is make images of all disks. This allows us to work on the RAID without risk. Then we use a read-only process to extract the data onto another form of storage. This is where downtime comes in. Unless you go for an emergency process, you could have to make do without the data for a number of days.

    So What’s The Way Forward?

    It’s one word. Redundancy.

    Whatever you do, make sure your data is replicated across as many types of storage as possible. In an ideal world you would have a duplicate system running alongside the live system, which can take over if anything goes wrong. Then have the data on another type of storage, which you can access from somewhere else. Imagine if the RAID controller failed, and you could only access the data from that one machine.

    It doesn’t matter how many backups you have if they all require the same system to access them.

    I’ve only just scratched the surface here, but you should always look to make extra copies of your data. It may seem redundant now, but when your server fails containing all your data, all your accounts, all your client details and your website, you’ll be glad you kept that extra copy.

  • Burning Linux ISO to USB Using a Mac

    My main computer is an old MacBook Pro. I often download Linux ISOs to install on other computers. In recent Debian-esque releases this is actually really simple.

    1. I find it quicker and easier to install from USB so first insert a USB pen / stick of some sort.

    Note: This USB stick will be erased, so don’t use one with data that you need to keep!

    2. Next we need to find out which number has been assigned to the USB stick. If you only have one disk in your Mac then the USB will usually be disk1, but always check first. (Note: Disks are numbered from zero, so your internal drive should be disk0) On your Mac open Disk Utility, which is located within Applications / Utilities. (See Image)

    Disk Utility
    Disk Utility

    Select the USB stick from the lefthand window and then click the Info button which is on the toolbar. (See Image)

    USB Info
    USB Info

    You will get a pop up window with loads of information about the device. We only need the Disk Identifier. Make a note of this for later.

    Disk Identifier
    Disk Identifier

    3. To allow us to write data to the USB stick we need to unmount any volumes currently on there. (see image)

    Unmount USB
    Unmount USB

    4. Now comes the actual writing. First locate the Terminal application, again within Applications / Utilities. (see image)

    Mac Terminal
    Mac Terminal

    5. Remember to change the code to match your Disk Identifier from earlier. There are a few things to note about the following command.

    • sudo – allows you to run dangerous commands, so will require an administrator password
    • Instead of typing the location of the ISO file you can just drag the ISO onto the terminal when required.
    • “if” means input file (in this case the ISO file), “of” means output file (the USB stick)
    • When we found out the Disk Identifier, it was disk1. That will work in the command, but we use rdisk1 instead, which gives us raw access to the disk. This may not be necessary, but it works for me.

    There is a lot of discussion about block sizes, but I find 4MB is reasonable for writing ISOs to USB. In Linux we often type bs=4M, however the Mac prefers it like bs=4096 instead. It’s the same thing, just expressed differently.

    The command:

    sudo dd if=[drag iso here] of=/dev/r[disk number] bs=4096; sync

    Example:

    sudo dd if=/Users/dan/Desktop/linux.iso of=/dev/rdisk1 bs=4096; sync

    If you’ve got it right, you shouldn’t get any feedback until it finishes. Your USB stick may have a blinking LED whilst the data is being written. For reference the 200MB debian-netinst ISO took just over a minute to write.

    Once complete you should get something like:

    48896+0 records in
    48896+0 records out
    200278016 bytes transferred in 95.151719 secs (2104828 bytes/sec)

    This means you’re finished. Now eject the USB and try to boot your PC with it. The Mac may complain that the disk is not readable but just ignore that and try it on a PC.

    Debian Boot
    Debian Boot
  • What is a Digital Negative

    We see various types of camera media come into us for data recovery, with surprisingly varied file formats. Many camera manufacturers use their own raw format, alongside various JPG options.

    This raw format is sometimes known as a digital negative, containing (mostly) untouched data straight from the camera. These raw format images can be ten times the size of JPG images.

    The benefits of raw files are to allow post-processing without the loss of quality from JPG files. Settings like sharpness, saturation and white balance can be changed at a later date using photographic software. Below are a few of the different raw file types in use.

    The following is a description about some RAW formats:

    • CRW – Canon Digital Camera Raw Image Format. Raw image format for some Canon digital cameras. Raw images are basically the data as it comes directly from the CCD detector in the camera. Raw files can also contain text information about the picture and conditions in the camera when the picture was taken.
    • CR2 – Canon Digital Camera Raw Image Format version 2.0. Raw files can also contain text information about the picture and conditions in the camera when the picture was taken. These images are based on the TIFF image standard.
    • NEF – Nikon Digital SLR Camera Raw Image File. Raw image format for some Nikon digital cameras.
    • RAF – Fuji CCD-RAW Graphic File. Exif (Exchangeable Image File) information is within the file along with the image.
    • X3F – Sigma Camera RAW Picture File. Use the SIGMA Photo Pro software provided with the camera to download and manipulate the photos. The Foveon X3 direct image sensor captures all three colors at every pixel location and requires special software to manipulate the RAW files.
    • BAY – Kodak/Roper Bayer Picture Sequence. A specific Kodak picture format used by some high speed video cameras such as Kodak HRC-1000.
    • ORF – Descent 3 Outrage Room Format.
    • MRW – Minolta Diamage Raw Image File. Raw image format for some Minolta digital cameras.
    • RAW – Image Alchemy HSI Temporary Raw Bitmap
    • SRF – Sony DSC-F828 Raw Image File. CCD-Sensor RAW Data File from Sony DSC-F828 8 megapixel digital camera.


  • ST373454LC Unusual RAID drives

    ST373454LC Unusual RAID Drive
    ST373454LC Unusual RAID Drive

    We have recently recovered a RAID 5 array which consisted of three of these ST373454LC SCSI hard drives. These are solid, weighty drives, which don’t give off a great deal of vibration, despite spinning at 15,000 rpm; 3 times faster than most laptop hard drives!

    Upon opening one of the drives for cleanroom rework we discovered why these drives  spin so quietly. In the picture below you can see that although the drives are standard 3.5″ form factor, they actually have 2.5″ disk platters. These smaller disks create less drag, and therefore can spin faster without stability problems.

    Inside a ST373454LC Hard Drive
    Inside a ST373454LC Hard Drive

    These drives are not alone in mixing up the form factors. The popular WD Raptor drives also use a similar design.

    Downside?

    Of course the biggest downside to using smaller disks is the lower storage capacity. Typically SCSI hard drives are much lower capacity than their SATA counterparts, so this trade-off is acceptable for the speed and reliability increases. The relatively low capacity is further mitigated when the drives are used in RAID arrays.

  • Extreme Close-Up: Toshiba Hard Drive [video]

    This is a video of a functional Toshiba laptop drive. Using a macro lens, we are able to see what happens when you read or write data to or from a hard drive. You can also see how the hard drive parks the heads off the disks when the power is shut off. This is to protect the hard drive from shocks during transportation.

    It’s my first one of these videos so you can see my reflection in a couple of places, when I lean over to send different commands to the drive.

  • Cheap USB Pen Data Recovery

    Cheap USB Pen Data Recovery

    Our low cost USB Pen & Camera Flash Media Recovery Services can recover data from physically broken, formatted and deleted USB Pens & Camera cards. 

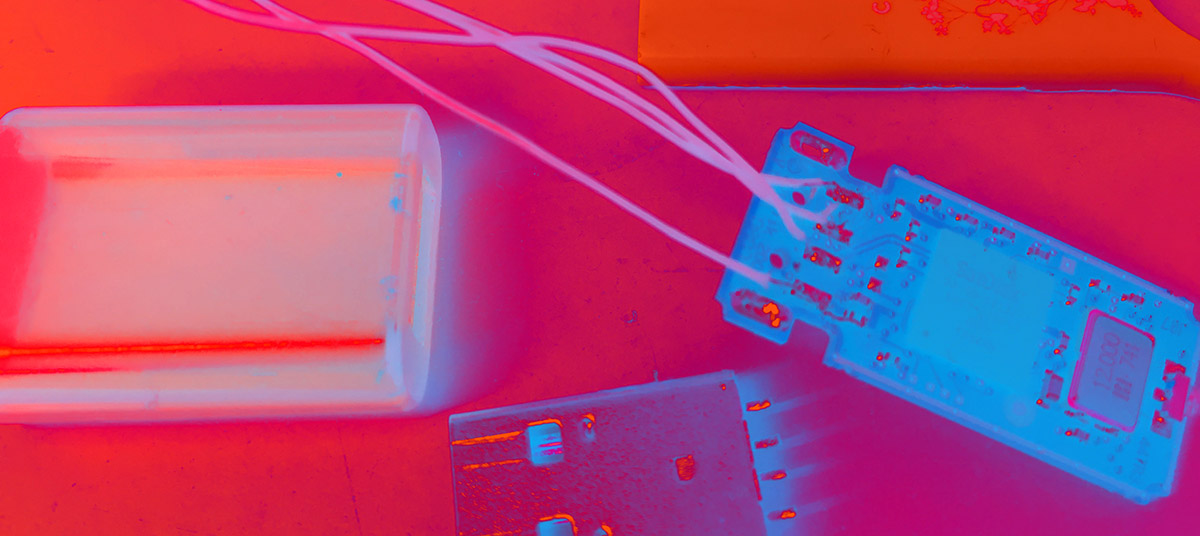
    We have just received an 8GB USB pen with a broken connector. The customer started phoning around and was shocked by the costs he was given. He then called us and was pleased to hear that we only charged £89 if the work was successful. This includes dismantling and repair of the USB Pen even when it appeared to be beyond repair.

    The recovery was 100% successful.

  • Bang Goes The Theory Data Recovery

    Bang Goes The Theory – Series 6 Episode 3 – March 26th

    Bang Goes The Theory Data Recovery

    I love Bang Goes The Theory. I loved the alcohol powered motorbikes last week and find it a good doorway into ideas, which are presented in a fun and interesting way. I was extra excited when I started watching episode 3, and relised they would be featuring data recovery. A perfect opportunity to dispel some common myths, and dish out a bit of advice in the process.

    Deletion

    The data recovery guy Rob, made a good analogy when he described deleting data as ripping out a page from the table of contents. That is pretty much how it works, and really simple to understand.

    Data Recovery Experts

    Yes they are the world leaders. I’m not going to dispute that, but I’m also not going to name them. They don’t exactly need the extra publicity. It’s worth noting that any decent recovery firm would have reached the same results from the batch of damaged drives.

    Getting Physical

    I do have a couple of problems with the way some of the drives were “destroyed.”

    1. Sledgehammer. This would have been a good way to destroy a drive, but only if it had been removed from the PC first. Effectively the metal PC case acted like armour, thus protecting the drive from the brunt of the impact.
    2. Tractor. Same as above. If the drive was bare, and on solid ground, then maybe the tractor would have done more damage. Instead, the PC case protected it sufficiently and all the data was recoverable.
    3. Golf Swing. This was great in the example shown, but is a bit unreliable. If you only hit the edge, or if the disk didn’t have glass platters then it may have been recoverable. Maybe take it apart first, then you can see if it’s damaged.
    4. Tea Damaged USB Pen. This was a good one. Solid state storage should survive liquid damage, as long as it is powered off at the time. When dried out, there is a good chance of getting the data back. The worst thing you could do is plug in a wet drive, as this would cause an electrical short, and potentially damage the electronics of the device, and even the computer you plugged it into.
    5. Big Magnet. This was a good one, and surprisingly effective. Only problems are the fact that most people don’t have a giant magnet, and unless you test it afterwards, you wouldn’t know if it had worked.
    6. Toaster. This is an interesting one for me. Of course the toaster damaged the PCB (circuit board) of this hard drive. These drives were quite old, so that was no major problem. If however these were more modern drives the story could have been quite different. A lot of newer drives encrypt the data using keys stored on the PCB. If you melt that PCB, then you have a very difficult job on your hands.
    7. Torched. 100% successful. If you can see the drive destroyed, then that’s perfect.

    Optical Discs

    Liz later made some good points about the reliability of CD / DVD storage. I agree that although the quoted life spans of DVDs are enormous, in reality DVDs often only last for a couple of years. We have had discs in for recovery that have been stored in temperature-controlled server rooms that have still failed well short of their estimated lifespans.

    Hard Disks

    Hard disks can last for ages. We have some here that are well over 15 years old and still going strong. The problem is that they can fail without any warning. It is sound advice to backup one drive with another, and then another. This is the only surefire way to avoid being stung by a failed drive. Dallas made a good point of moving one of the backups off site, which is also a good idea.

    Scrambling Software

    I didn’t like the scrambling advice given near the end. There are problems with the way hard drives are designed, which can prevent the software from accessing bad sectors, and hidden parts of the disk. Although only small parts of the disk, you could leave enough data there to be targeted by fraudsters or whoever.

    I advise a two pronged approach. First erase / scramble the data, then physically destroy the drive. This makes it far less likely that your data could end up in the wrong hands.

    Summary

    It is good to see this sort of thing on mainstream TV, and the advice given was a good starting point for most people. Despite my points above, it was basically a good show: Interesting and informative, with a decent amount of good info.

    Many people have little or no knowledge of the way their data is stored, so any way to bring this to their attention is good in my books.